
i.MX 93 FRDM & EVK Boards
During this Getting Started, you will learn to:
Run an Application on the i.MX93 Virtual Device.
Run the same Application on your FRDM i.MX93 Development Board or i.MX93 Evaluation Kit.
In case you are not familiar with MicroEJ, please visit Discover MicroEJ to understand the principles of our technology.
Prerequisites
Note
This Getting Started has been tested on Windows 10 & 11 with a WSL distribution Ubuntu 22.04. Also note that the examples used in this Getting Started guide may depend on older tools and libraries. Notably, our dependency manager plugin (using Gradle) may be an older version.
This Getting Started is separated into two main parts.
The first part consists of running a demo application on the Virtual Device. All you need is:
An Internet connection to access GitHub repositories & Module Repositories.
MICROEJ SDK 6 (installed during Environment Setup).
The second part consists of running the same demo application on your device. For that, you will need:
One of these two Development Boards:
FRDM i.MX93 Development Board, available here.
i.MX93 Evaluation Kit, available here.
With an IMX-MIPI-HDMI adapter to connect the HDMI display.
An HDMI display with a touchscreen.
This getting started has been tested with a 1280x720 HDMI display: MageDok T080A.
A prebuilt Yocto Linux image, with all necessary Linux packages preinstalled.
A Yocto SDK, to cross-compile a sample application.
Environment Setup
To follow this Getting Started, you need to:
Install MICROEJ SDK 6.
Get the Example-Java-Widget from github.
Install MICROEJ SDK 6
Install MICROEJ SDK 6 by following the Installation instructions.
IntelliJ IDEA is used in this Getting Started, but feel free to use your favorite IDE.
Get Example-Java-Widget
For this Getting Started, the Example-Java-Widget Application will be used. You can download it using the following command:
git clone -b 8.1.1 https://github.com/MicroEJ/Example-Java-Widget.git
Note
If you don’t have Git installed, you can download the source code directly from our GitHub repository. Then you can click on:Code > Download ZIP.
Set up the Application on your IDE
Import the Project
The first step is to import the Example-Java-Widget Application into your IDE:
Note
If you are using another IDE than IntelliJ IDEA, please have a look at Import a Project section.
If you are in the Welcome Screen, click on the Open button. Otherwise, click either on File > Open… or on File > New > Project From Existing Sources….
Select the
Example-Java-Widgetdirectory located where you downloaded it and click on the OK button.
If you are asked to choose a project model, select Gradle.
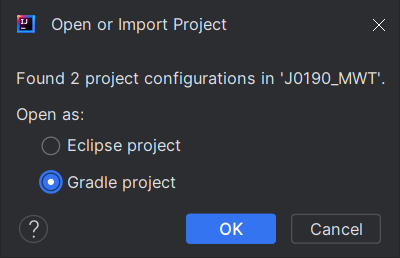

Fig 1. Project Model Selection when Opening in IntelliJ IDEA Fig 2. Project Model Selection when Importing in IntelliJ IDEA Click on the Create button.
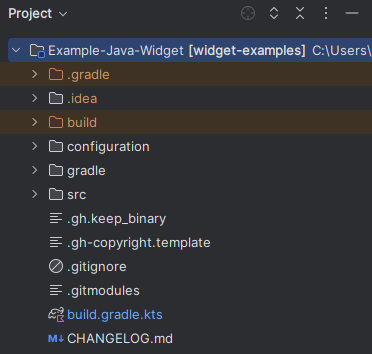
The Gradle project should now be imported into IntelliJ IDEA. Your workspace contains the following projects:
Select the VEE Port
For this getting started, we will use the i.MX93 VEE Port demo module that is available on the Developer Repository.
In the Gradle build file build.gradle.kts, replace the VEE dependency microejVEE with the i.MX93, like this:
dependencies {
   microejVee("com.microej.veeport.imx93:vee-port:3.1.0")
}
For more information about how to select a VEE Port please refer to the following section: Select a VEE Port.
Accept the MICROEJ SDK EULA
You may have to accept the SDK EULA if you haven’t already done so, please have a look at SDK EULA Acceptation.
Run an Application on the Virtual Device
To execute the Example-Java-Widget Application on the Virtual Device, the SDK provides the Gradle runOnSimulator task.
Note
If you are using another IDE than IntelliJ IDEA, please have a look at the Run on Simulator section.
Double-click on the runOnSimulator task in the Gradle tasks view. It may take a few seconds.

The Virtual Device starts and executes the Example-Java-Widget application.
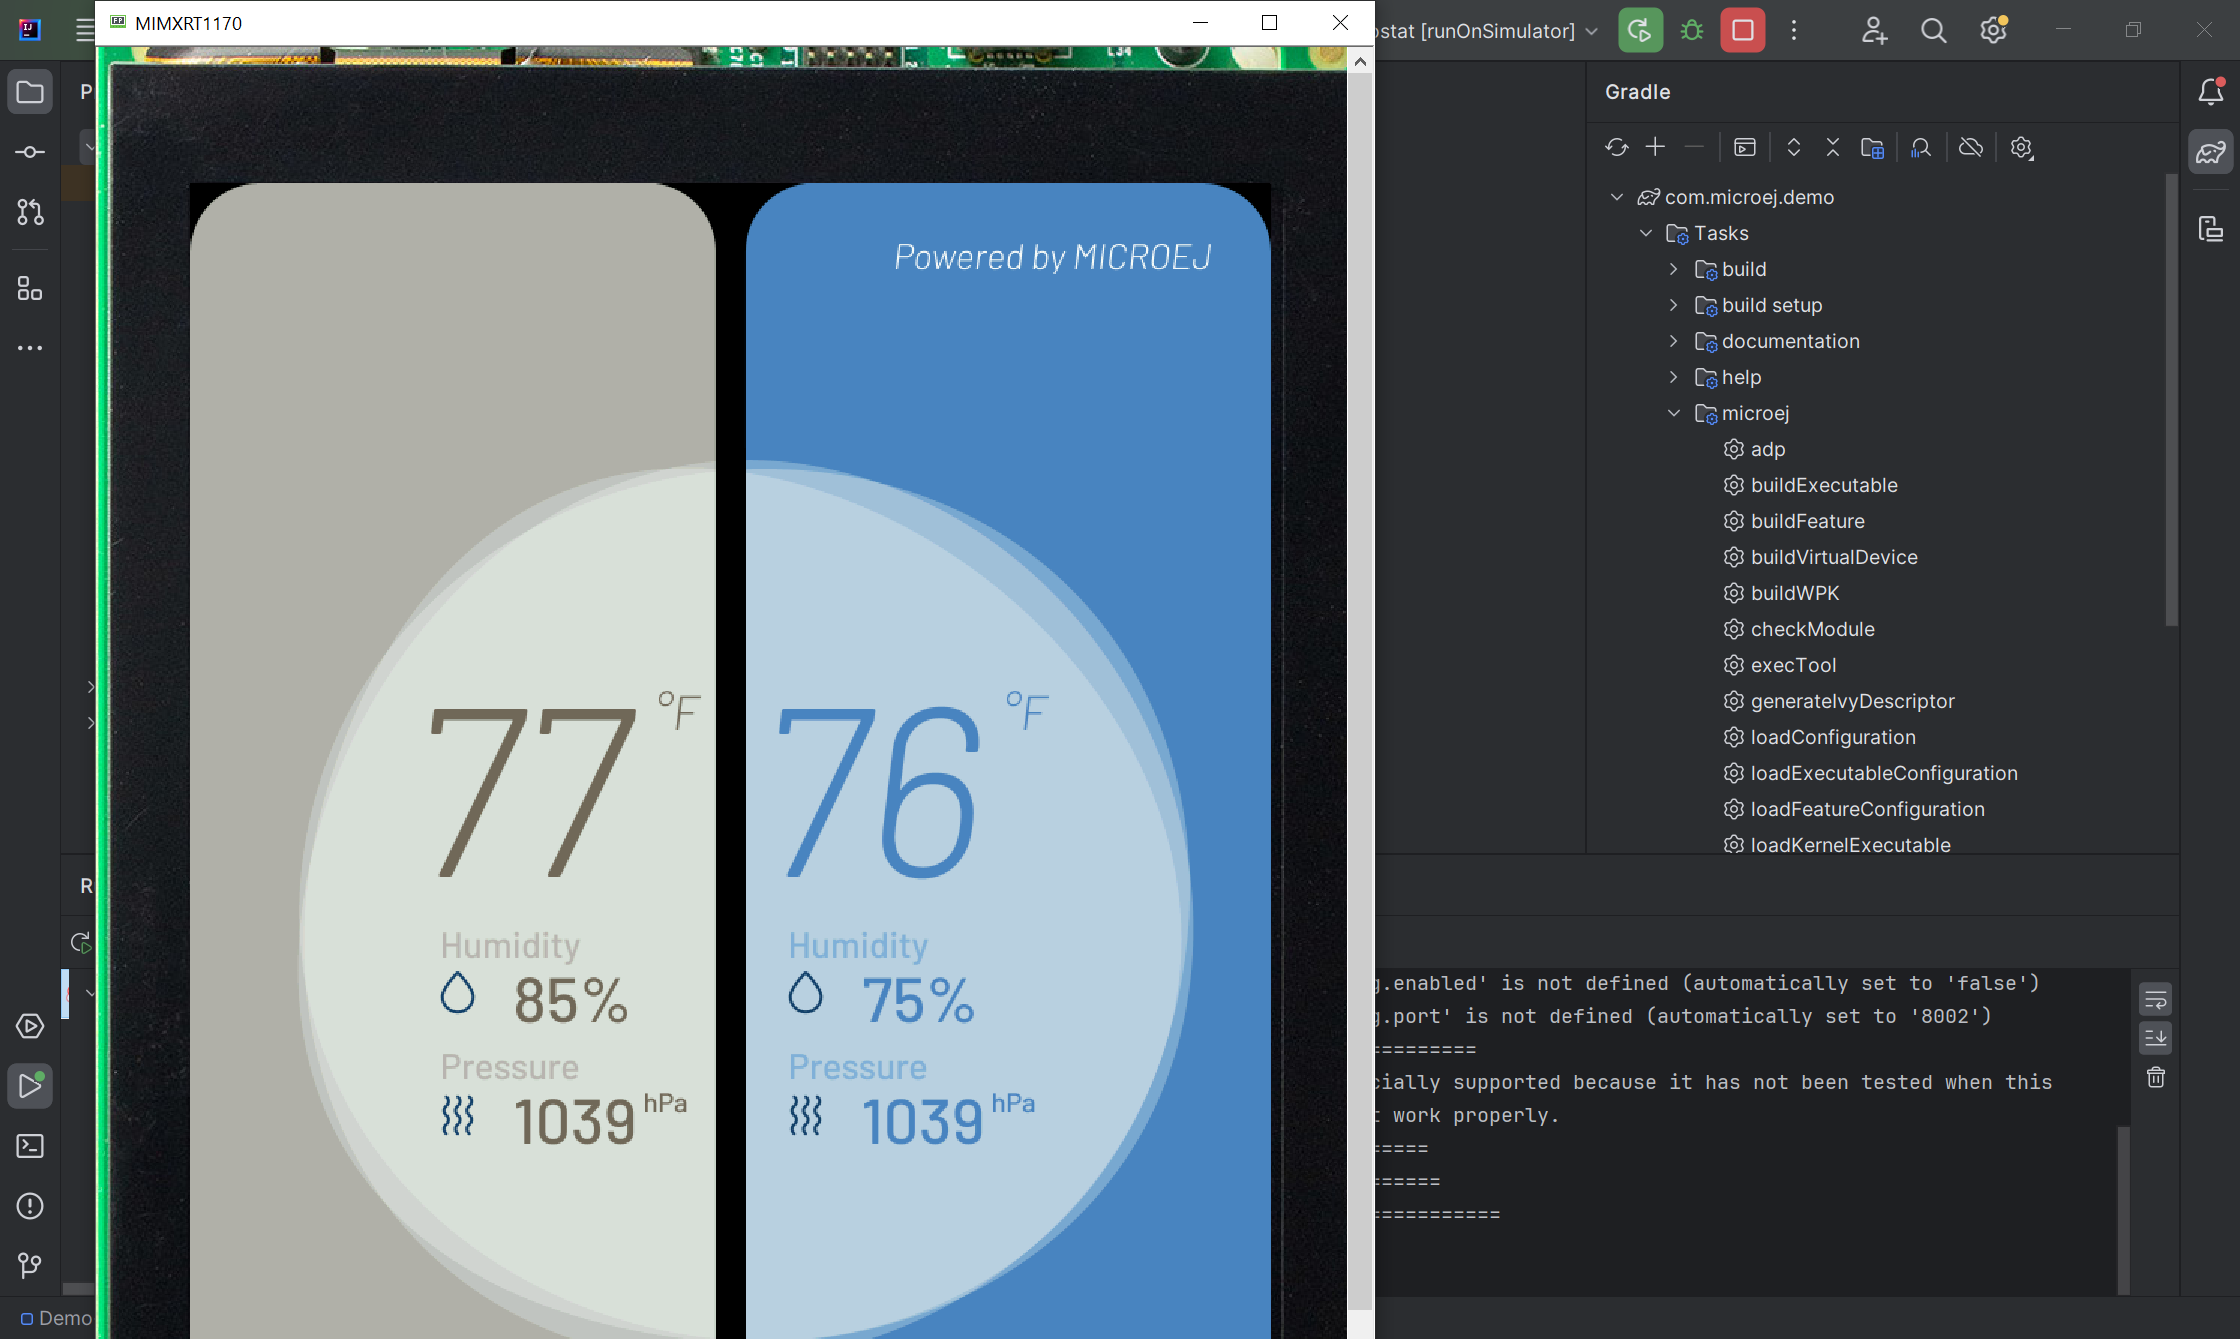

Well done!
Now you know how to run an application on a Virtual Device.
If you want to learn how to run an application on your i.MX93, you can continue this Getting Started: Run an Application on i.MX93.
Otherwise, learn how to Modify the Java Application.
Run an Application on i.MX93
To deploy Example-Java-Widget application on your board, you will have to:
Set up your environment (toolchain, hardware setup).
Request a 30 days Evaluation License and install an activation key.
Build the Executable.
Run the Executable on board.
Environment Setup
This chapter takes approximately one hour and will take you through the steps to build a VEE Executable and set up the device.
Install the Yocto SDK
The Executable is built using a Yocto SDK. It contains the following:
The C toolchain.
The cross-compiled libraries.
All the necessary headers (libc, but also the headers of the kernel and the libraries installed in the firmware rootfs).
An environment setup script (to set $CC, $LD, $SDKSYSROOT variables).
To install the Yocto SDK, use the following commands in WSL or Linux:
$ curl -O https://repository.microej.com/packages/yocto/i.MX93EVK/2024-04-30-IMX93-oecore-x86_64-armv7at2hf-neon-vfpv4-toolchain-nodistro-1.0.0.sh
$ chmod +x 2024-04-30-IMX93-oecore-x86_64-armv7at2hf-neon-vfpv4-toolchain-nodistro-1.0.0.sh
$ ./2024-04-30-IMX93-oecore-x86_64-armv7at2hf-neon-vfpv4-toolchain-nodistro-1.0.0.sh
MicroEJ: 32-bit userspace + 64-bit kernel SDK installer version nodistro.0
==========================================================================
Enter target directory for SDK (default: /usr/local/oecore-x86_64):
You are about to install the SDK to "/usr/local/oecore-x86_64". Proceed [Y/n]? Y
[sudo] password for xxxxx:
Extracting SDK.................................................................................done
Setting it up...done
SDK has been successfully set up and is ready to be used.
Each time you wish to use the SDK in a new shell session, you need to source the environment setup script e.g.
$ . /usr/local/oecore-x86_64/environment-setup-armv7at2hf-neon-vfpv4-oemllib32-linux-gnueabi
$ . /usr/local/oecore-x86_64/environment-setup-cortexa55-oe-linux
The installation path can then be used to build the VEE Executable.
Install Required Packages
Some additional packages will be required in order to build an executable. Run the following command (either in Linux or WSL):
sudo apt-get update && sudo apt-get install dos2unix make
Flash the image on an SD card
The Linux images are available here:
For this getting started we use a Linux image flashed on an SD card.
Linux
To flash the image on Linux, use the following command (assuming the SDCard device is /dev/mmcblk0):
bmaptool copy lib32-core-image-microej-microej-imx93.wic.gz /dev/mmcblk0
Windows
To flash the image on Windows, do the following:
Install Rufus: https://rufus.ie/en/.
Extract the
.wicfile from the archivelib32-core-image-microej-microej-imx93.wic.gz.Select your SD card device in the list at the top (see example of configuration below).
Select your
.wicfile by clicking onSELECTFinally click on
STARTat the bottom and wait for the process to finish.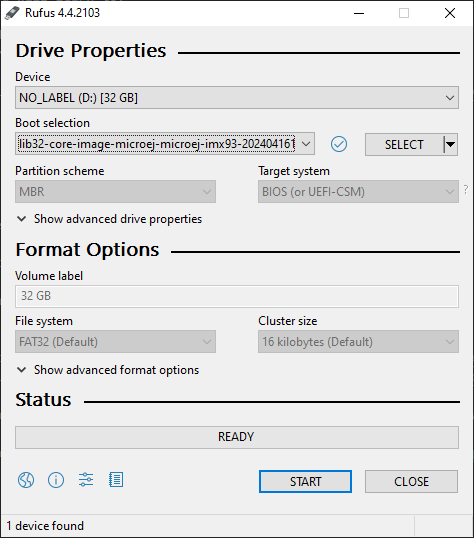
Hardware Setup
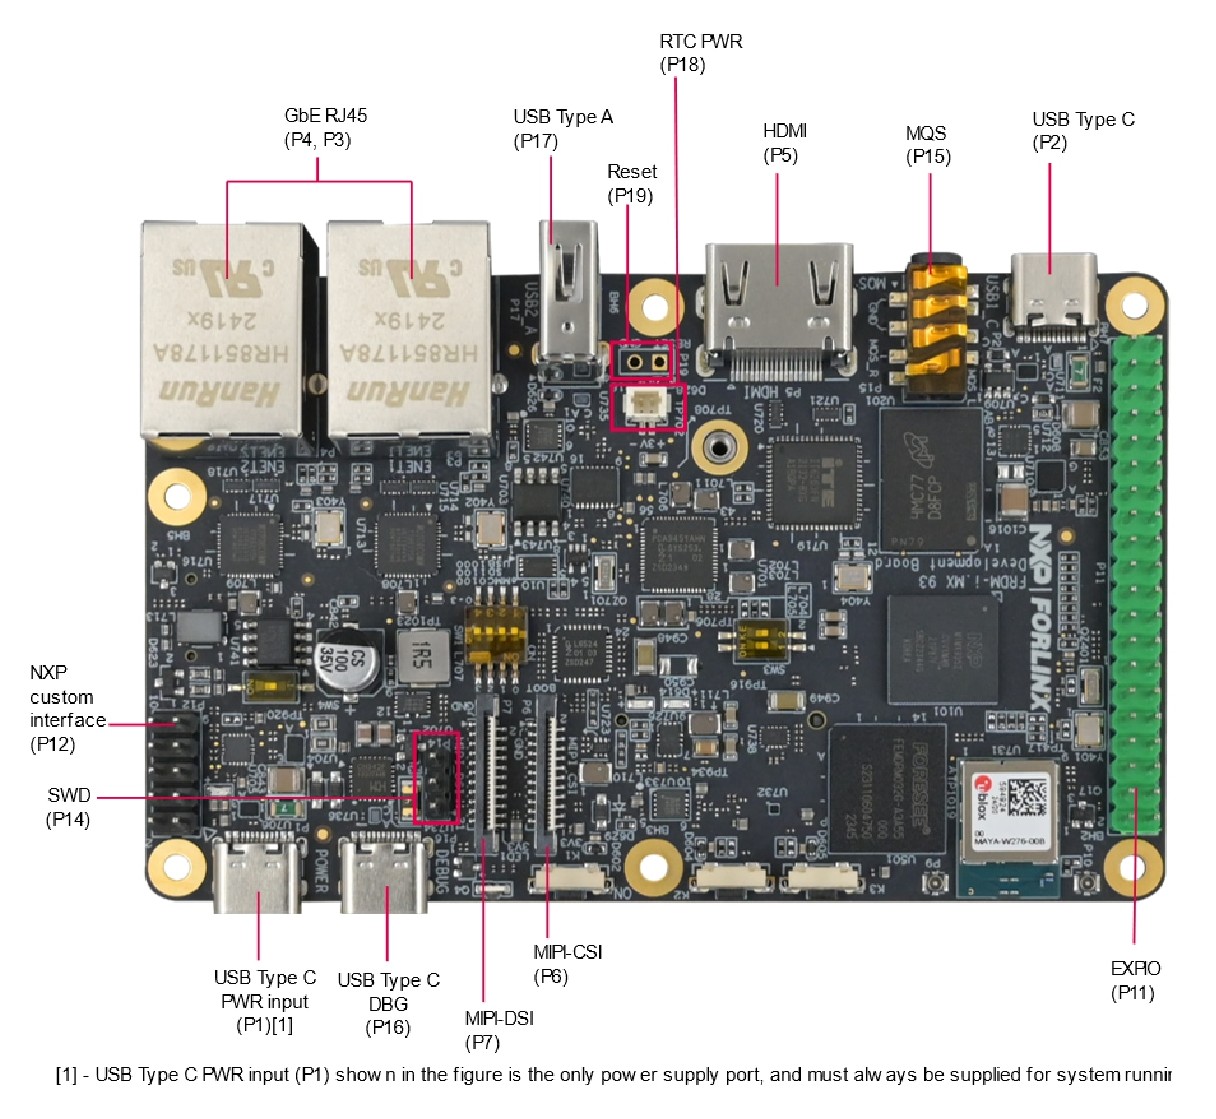
To set up the hardware you will need to connect the following on the Development Board:
A USB C cable to the PWR input (P1)
A USB C cable to the DBG port (P16)
A USB C, or USB A cable for the touchscreen device (P2 or P17).
A RJ45 cable to access the network.
An HDMI cable.
By default, the i.MX93 evaluation kit will boot from the eMMC.
To change the boot mode to micro SD, set the DIP switch SW1 [3-0] to 0011.
The serial port is used to connect to a shell, it uses the following parameters:
Baudrate |
Data bits |
Parity bits |
Stop bits |
Flow control |
|---|---|---|---|---|
115200 |
8 |
None |
1 |
XON/XOFF |
To connect to the shell enter the login root.
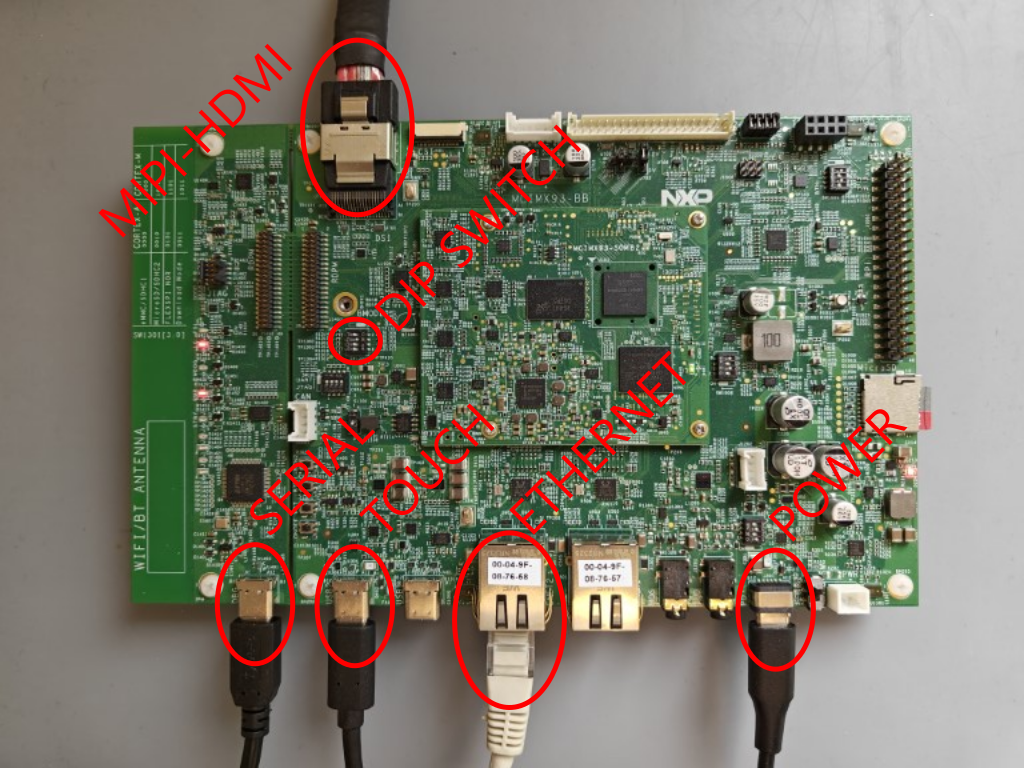
To set up the hardware you will need to connect the following on the EVK:
A USB C cable for the power (provided with the EVK).
A USB C cable for the serial port.
A USB C cable for the touchscreen device.
A RJ45 cable to access the network.
An HDMI cable connected to the IMX-HDMI-MIPI adapter.
By default, the FRDM i.MX93 evaluation kit will boot from the eMMC.
To change the boot mode to micro SD, set the DIP switch BMODE to 0100, i.e. SW1301-2 set to 1.
The serial port is used to connect to a shell, it uses the following parameters:
Baudrate |
Data bits |
Parity bits |
Stop bits |
Flow control |
|---|---|---|---|---|
115200 |
8 |
None |
1 |
XON/XOFF |
To connect to the shell enter the login root.
Touchscreen calibration
The touch screen needs to be calibrated before using the application.
This can be done using the ts_calibrate tool provided by tslib on Linux.
Open a console on the target (SSH or serial), start the calibration tool and follow the instructions on your device screen:
export TSLIB_TSDEVICE=/dev/input/touchscreen0
export TSLIB_CONFFILE=/etc/ts.conf
export TSLIB_CALIBFILE=/etc/ts.calib
ts_calibrate
Congratulations! You have finished the setup of your environment. You are now ready to discover how to build and run a MicroEJ application.
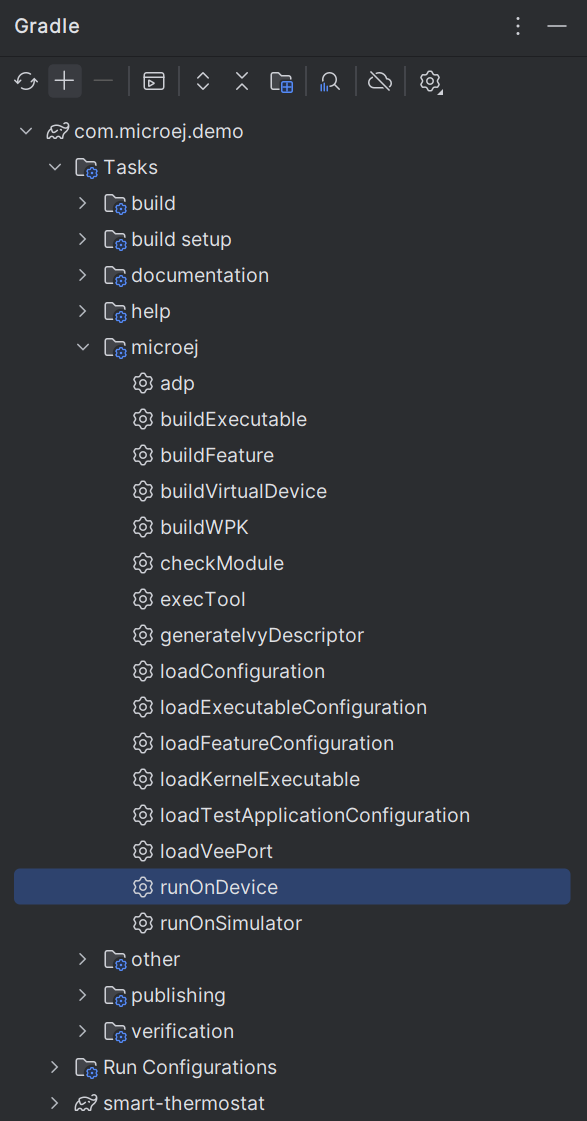
Build the Executable for i.MX93
In order to build the Executable of the Example-Java-Widget Application, the SDK provides the buildExecutable Gradle task.
Note
If you are using another IDE than IntelliJ IDEA, please have a look at Build an Executable section. Come back to this page if you need to activate an Evaluation License.
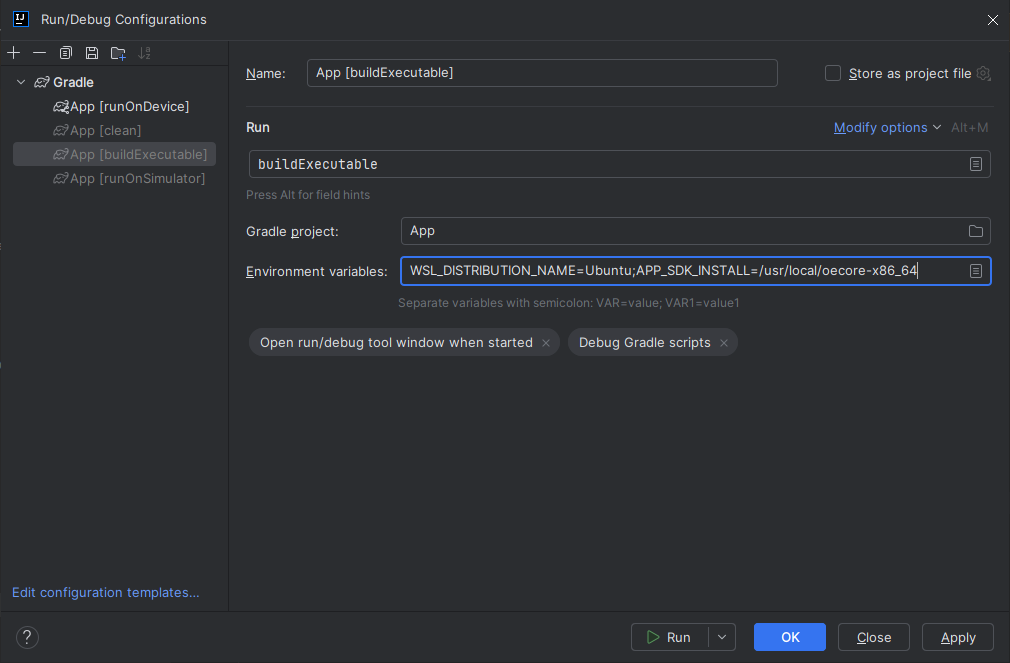
Before using this task, you will have to configure some environment variables that depend on the OS you are using.
To do so, right-click on
buildExecutablethenModify Run Configuration....Fill in your variables in
Environment variables, each one separated by a semicolon (see screenshot):If you changed the default Yocto SDK installation path, set the following environment variable
APP_SDK_INSTALL: Path to the Yocto SDK (by default/usr/local/oecore-x86_64/)
When using Windows with WSL, set the WSL distribution name, which you can get with the command wsl –list in Windows terminal
WSL_DISTRIBUTION_NAME: Name of the WSL distribution if using Windows (by defaultUbuntu).
Double-click on the buildExecutable task in the Gradle tasks view.
The build stops with a failure.
Go to the top project in the console view and scroll up to get the following error message:

Copy the UID. It will be required to activate your Evaluation license.
Request your Evaluation License:
Request your Evaluation license by following the Request your Activation Key instructions. You will be asked to fill the machine UID field with the UID you copied before.
When you have received your activation key by email, drop it in the license directory by following the Install the License Key instructions (drop the license key zip file to the
~/.microej/licenses/directory).
Now your Evaluation license is installed, you can relaunch your application build by double-clicking on the buildExecutable task in the Gradle tasks view. It may take some time.
The Gradle task deploys the Application in the BSP and then builds the BSP using Make.
The Example-Java-Widget application is built and ready to be flashed on i.MX93 Evaluation Kit once the hardware setup is completed.
Run the Application on the i.MX93
To run the Example-Java-Widget Application on i.MX93, the application provides the Gradle runOnDevice task.
Note
If you are using another IDE than IntelliJ IDEA, please have a look at the Run on Device section.
Before using this task, you will have to configure the device IP Address in the environment variables.
To do so, right-click on
runOnDevicethenModify Run Configuration....Fill in your variables in
Environment variables, each one separated by a semicolon:SSH_USER=rootSSH_HOSTNAME: IP address of the i.MX93.APP_SDK_INSTALL: Path to the Yocto SDK (by default/usr/local/oecore-x86_64/).WSL_DISTRIBUTION_NAME: Name of the WSL distribution if using Windows (by defaultUbuntu).
Double-click on the runOnDevice task in the Gradle tasks view. It may take some time.
Once the application is running, you should see the Example-Java-Widget on your board.
Modify the Java Application
With MicroEJ, it is easy to modify and test your Java application on the Virtual Device.
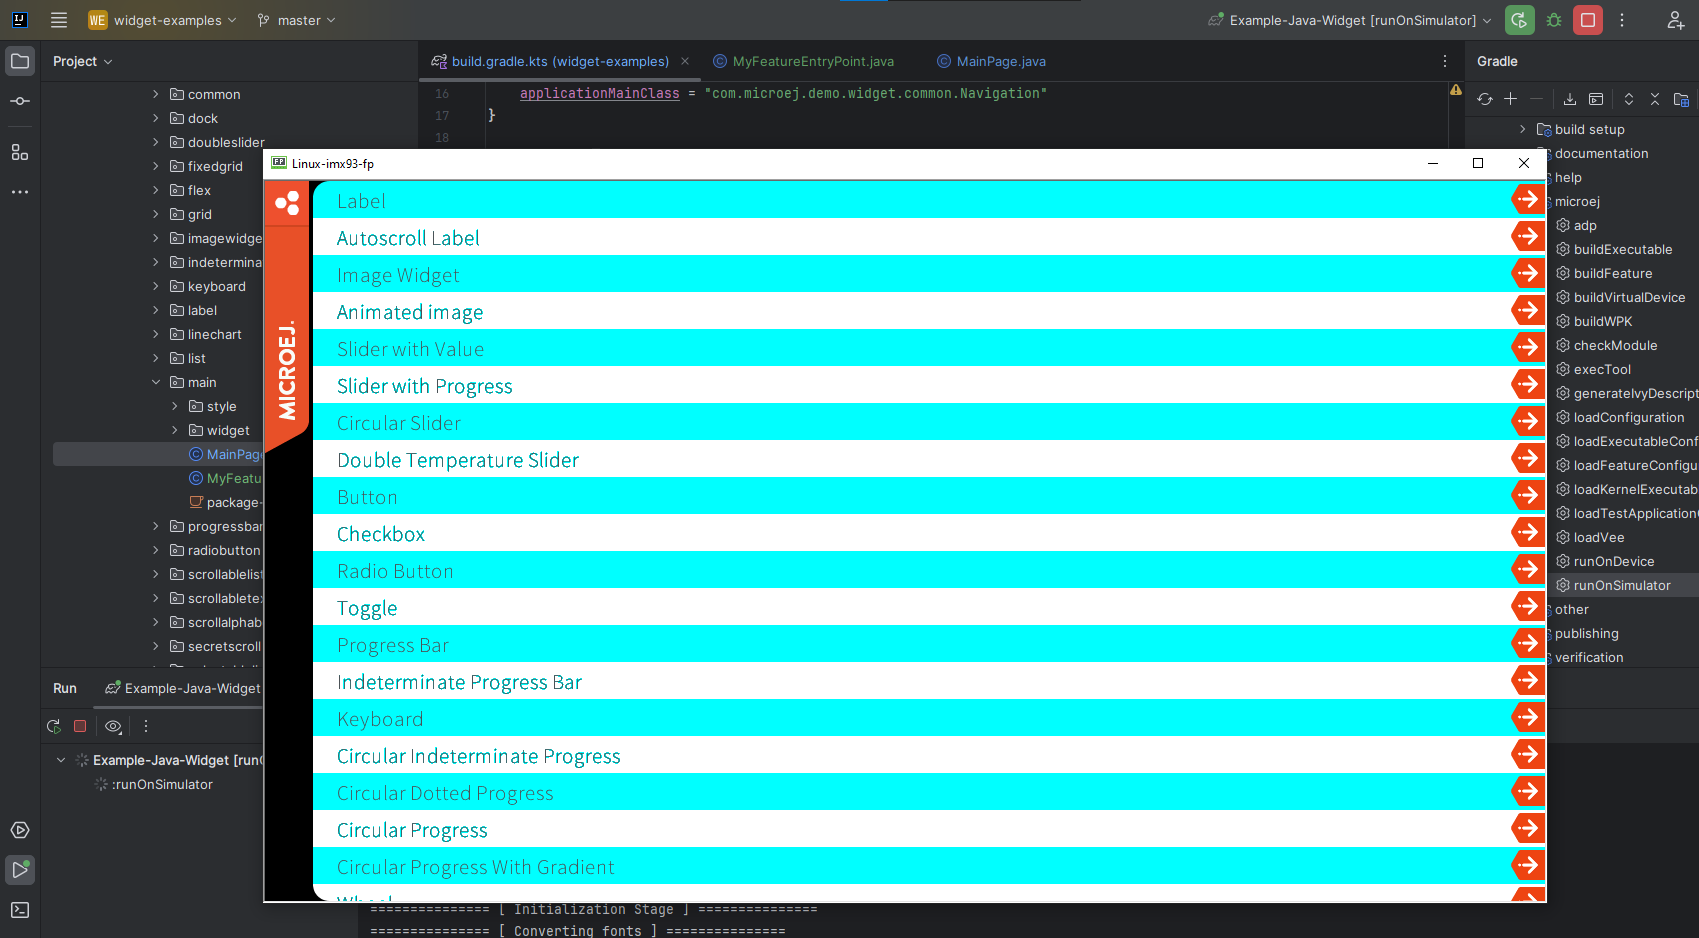
For example, we can modify the color of the items in the main page list.
Open MainPage.java located in the src/main/java/com/microej/demo/widget/main/MainPage.java folder
Odd items background color is set line 74, replace the following line:
style.setBackground(new GoToBackground(GRAY));
with
style.setBackground(new GoToBackground(Colors.CYAN));
Follow Run an Application on the Virtual Device instructions to launch the modified application on the Virtual Device.
Going Further
You have now successfully executed a MicroEJ application on an embedded device, so what’s next?
If you are an application developer, you can continue to explore MicroEJ’s APIs and functionalities by running and studying our samples at GitHub:
Foundation Libraries |
Eclasspath |
IoT |
This project gathers all the basic examples of the foundation libraries. |
This project gathers all the examples of eclasspath. |
This project gathers simple applications using net libraries. |
You can also learn how to build bigger and better applications by reading our Application Developer Guide.
If you are an embedded engineer, you could look at our VEE port examples at GitHub. And to learn how to create custom VEE Ports, you can read our VEE Porting Guide.
You can also follow the Kernel Developer Guide for more information on our multi-application framework or read about our powerful wearable solution called VEE Wear.
Last but not least, you can choose to learn about specific topics by following one of our many Training Courses ranging from how to easily debug applications to setting up a Continuous Integration process and a lot of things in between.