
Build a Virtual Device
In order to build the Virtual Device of an Application, the SDK provides the Gradle buildVirtualDevice task.
Refer to the Virtual Device page for more information about the Virtual Device.
The prerequisites to use the buildVirtualDevice task are:
The Application EntryPoint must be configured, as described in Configure a Project.
A target VEE that uses an Architecture version
7.17minimum must be defined:If your VEE is a VEE Port, refer to the Select a VEE Port page to know the different ways to provide a VEE Port for a module project.
If your VEE is a Kernel, refer to the Select a Kernel page to know the different ways to provide a Kernel for a module project.
Once these prerequisites are fulfilled, the Virtual Device can be built:
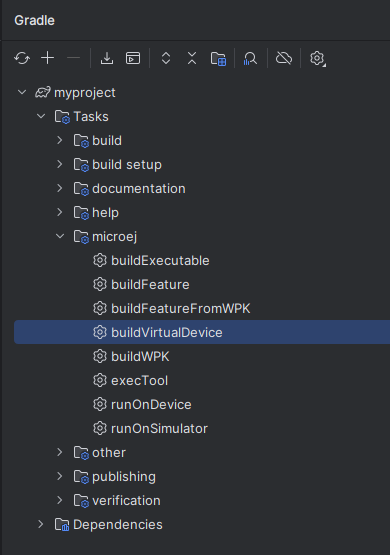
By double-clicking on the buildVirtualDevice task in the Gradle tasks view:
Warning
Android Studio does not allow to run multiple Gradle tasks in parallel. If you still want to execute several Gradle tasks simultaneously, you can launch them from a terminal with the Gradle Command Line Interface (CLI).
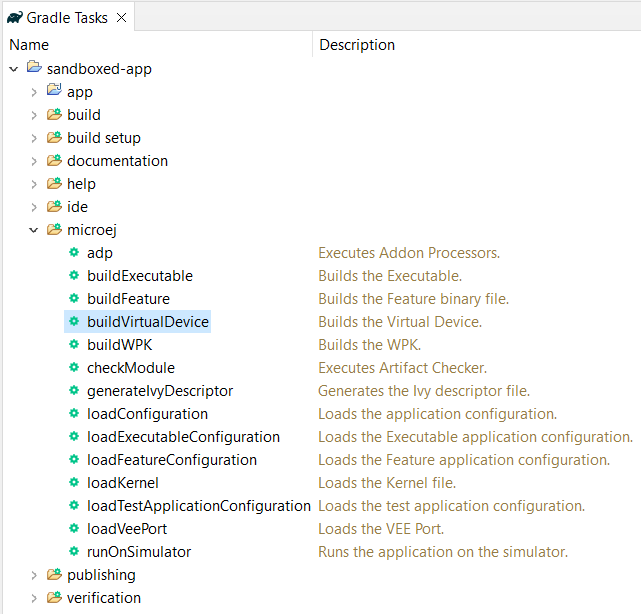
By double-clicking on the buildVirtualDevice task in the Gradle tasks view:
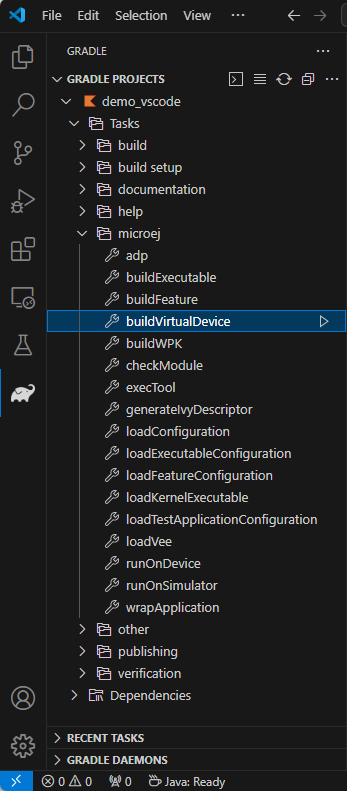
By double-clicking on the buildVirtualDevice task in the Gradle tasks view:
From the command line interface:
$ ./gradlew buildVirtualDevice
When the build is completed, the Virtual Device is available in the build/virtualDevice folder of the project.
Note
If the provided VEE is a Kernel, the generated Virtual Device is an augmented version of the Kernel Virtual Device, in which the Application is set as a Pre-Installed Application.
The Virtual Device can then be used to run an Application on the Simulator for example.
Embed JDKs in a Virtual Device
The Virtual Device can embed its own JDK,
so it can run out of the box without requiring a JDK to be installed on the target system.
This feature is disabled by default and can be enabled by setting the microej > virtualDevice > includeJdks
property to true in the build.gradle.kts file of the project:
microej {
   virtualDevice {
      includeJdks = true
      jdkWindowsX64Url = "https://github.com/adoptium/temurin11-binaries/releases/download/jdk-11.0.26%2B4/OpenJDK11U-jdk_x64_windows_hotspot_11.0.26_4.zip"
      jdkLinuxX64Url = "https://github.com/adoptium/temurin11-binaries/releases/download/jdk-11.0.29%2B7/OpenJDK11U-jdk_x64_linux_hotspot_11.0.29_7.tar.gz"
   }
}
As shown in the sample above, the URLs of the JDKs to download and embed must be defined for each OS/Architecture you want to support.
The JDK URLs can be specified for the 3 OSes Windows, Linux and macOs, and the 2 Architectures x64 and Aarch64, thanks to the following properties:
jdkWindowsX64Url:Windowsonx64jdkWindowsAarch64Url:WindowsonAarch64jdkLinuxX64Url:Linuxonx64jdkLinuxAarch64Url:LinuxonAarch64jdkMacOsX64Url:macOsonx64jdkMacOsAarch64Url:macOsonAarch64
It’s worth mentioning that only .zip and .tar.gz files are supported.
Warning
Embedding JDKs in the Virtual Device makes its usage easier but comes with a cost in terms of size. Each JDK adds several dozen of MB, that can lead to a quite big Virtual Device Archive.
Add a Pre-Installed Application in a Virtual Device
When building a Virtual Device for a Kernel, Applications can be pre-installed inside. These Applications can be loaded and started when the Kernel starts for example.
To install an Application in a Virtual Device for a Kernel, you must declare the Application as a dependency of the project:
When the Application is published in an artifact repository, you can use it by declaring a Module dependency:
dependencies {
   microejApplication("com.mycompany:myapp:1.0.0")
}
When the Application is a subproject of a multi-project, you can use it by declaring a Project dependency in the
build.gradle.ktsfile, with themicroejApplicationconfiguration:dependencies { microejApplication(project(":myApplication")) }
You can also use the Application WPK file directly by declaring a File dependency in the
build.gradle.ktsfile, with themicroejApplicationconfiguration:dependencies { microejApplication(files("C:\\path\\to\\my\\application.wpk")) }
Warning
Only modules with the Application Module Nature can be declared this way (modules built with the
com.microej.gradle.applicationplugin). Declaring a module with another Module Nature would make the build fail.The VEE Port used to create the Virtual Device has to be a Multi-Sandbox VEE Port to support the load of these pre-installed Applications.
Add a Kernel API in a Virtual Device
When building a Virtual Device for a Kernel, the Kernel must define the set of classes, methods and static fields all applications are allowed to use. This can be done by declaring Kernel APIs as a dependency in the build file:
dependencies {
   implementation("com.microej.kernelapi:edc:1.2.0")
}
Add a Runtime Environment in a Virtual Device
When building a Virtual Device for a Kernel, the set of classes, methods and static fields allowed to be used by all applications can be defined by declaring a Runtime Environment as a dependency in the build file:
dependencies {
   microejRuntimeEnvironment("com.mycompany:myruntime-environment:1.0.0")
}
The transitive dependencies of the Runtime Environment are then embedded in the Virtual Device.
Add a Tool in a Virtual Device
When building a Virtual Device, it is possible to define additional MicroEJ Tools to install inside,
by adding a dependency with the microejTool configuration. For example, to install the Local Deployment Socket tool,
add the following dependency to the build file of the project:
dependencies {
   microejTool("com.microej.tool.kernel:localdeploy-extension:1.0.0")
}
Trigger Virtual Device Build by Default
The Virtual Device of an Application is not built and published by default (when launching a ./gradlew build or
a ./gradlew publish for example).
This default behavior can be changed by adding the produceVirtualDeviceDuringBuild() method
in the microej configuration block of the Gradle build file of the project:
microej {
  produceVirtualDeviceDuringBuild()
}