This chapter will guide you through the installation process of the SDK on your workstation
to start writing applications for MicroEJ-ready devices and running them on a virtual (simulated) or real device.
The SDK is mainly composed of Gradle Plugins and IDE Plugins,
so the installation process will explain how to perform the following actions:
Install a JDK (if no compatible version is installed on the workstation).
Configure the Gradle repositories (to automatically download the Gradle plugins).
Accept the SDK EULA.
Install an IDE and the MicroEJ plugin.
First check the System Requirements before proceeding.
The SDK requires a JDK (not a JRE) 11 or a higher LTS version to be installed and:
The JAVA_HOME environment variable set to the path of a JDK.
OR
The java and javac executables of a JDK available in the PATH.
If the JAVA_HOME is set to a JDK, make sure that it is a JDK 11 or a higher LTS version.
If the JAVA_HOME is not set, make sure the JDK executables are available in the PATH environment variable.
To check, execute java-version in a terminal:
If the java program is not found, it means there is no JDK installed or it is not available in the PATH or JAVA_HOME environment variables.
If it is not installed, you can download and install one from Adoptium.
If the java program is found but not the javac program, it means a JRE is installed and used, not a JDK.
In this case, install a JDK. You can download and install one from Adoptium.
In order to use the SDK Gradle plugins and modules in your project,
the Central and Developer repositories must be configured.
There are several ways to declare repositories.
To get started, you can declare them globally to make them available in all your projects:
Create the folder <USER_HOME>/.gradle/init.d if it does not exist.
Download and copy thisfile in the previously created folder.
At this stage, you can already build a project from the command line,
for example, by executing the command ./gradlewbuild at the root of the project.
But let’s continue the installation process to have a complete development environment.
Note
This configuration makes MicroEJ Central and Developer repositories available to every project.
If you have several repositories configuration specific to certain projects, you can refer to multiple repository configuration how-to
The use of MICROEJ SDK 6 requires to accept the SDK EULA.
The acceptance can be done at the project level or system-wide. For a system-wide acceptance, we recommend to define
the accept-microej-sdk-eula-v4-1a system property in a gradle.properties file in your Gradle User Home folder <USER_HOME>/.gradle/gradle.properties:
systemProp.accept-microej-sdk-eula-v4-1a=YES
Refer to SDK EULA Acceptation section of Licenses to get more information about SDK EULA, and alternative configurations.
Using an IDE is highly recommended for developing MicroEJ projects, making the development more comfortable and increasing productivity.
The following IDEs are supported:
IntelliJ IDEA (Community or Ultimate edition) - Minimum supported version is 2021.2.
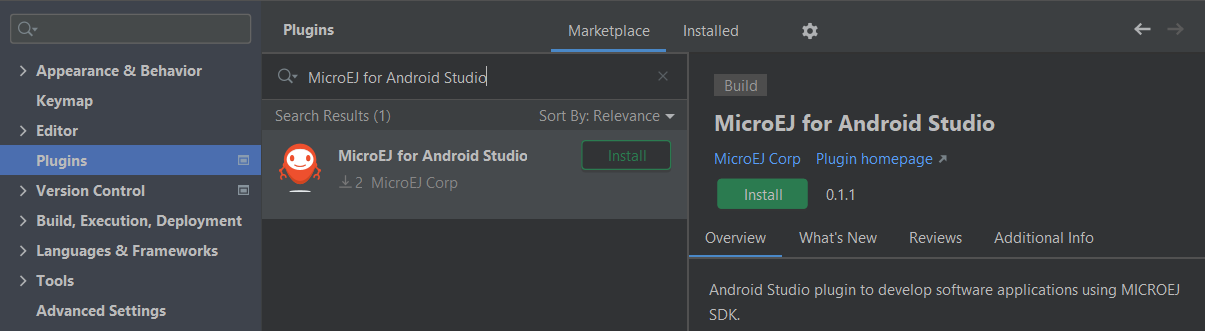
Android Studio - Minimum supported version is Hedgehog-2023.1.1.
In the upcoming Third-Party Plugins Notice window, click on the Accept button.
IntelliJ IDEA Plugin Installation - Third-Party Plugins Notice
Click on the Restart IDE button.
Warning
Until version 2025.2, due to an IntelliJ IDEA bug, a lot of errors are raised in Gradle build files (build.gradle.kts).
It has been fixed in version 2025.3, so it is highly recommended to upgrade to this version.
If you cannot upgrade to this version, you should follow these steps to remove these errors:
In IntelliJ IDEA, open the Settings window (menu File > Settings… on Windows and Linux,
menu IntelliJ IDEA > Settings… on macOS).
In the upcoming Third-Party Plugins Notice window, click on the Accept button.
Android Studio Plugin Installation - Third-Party Plugins Notice
Click on the Restart IDE button.
Warning
There used to be a unique plugin for both Android Studio and IntelliJ IDEA. Each IDE now has its own dedicated plugin,
so if the IntelliJ IDEA MicroEJ plugin has been previously installed, you should uninstall it and install MicroEJforAndroidStudio instead.
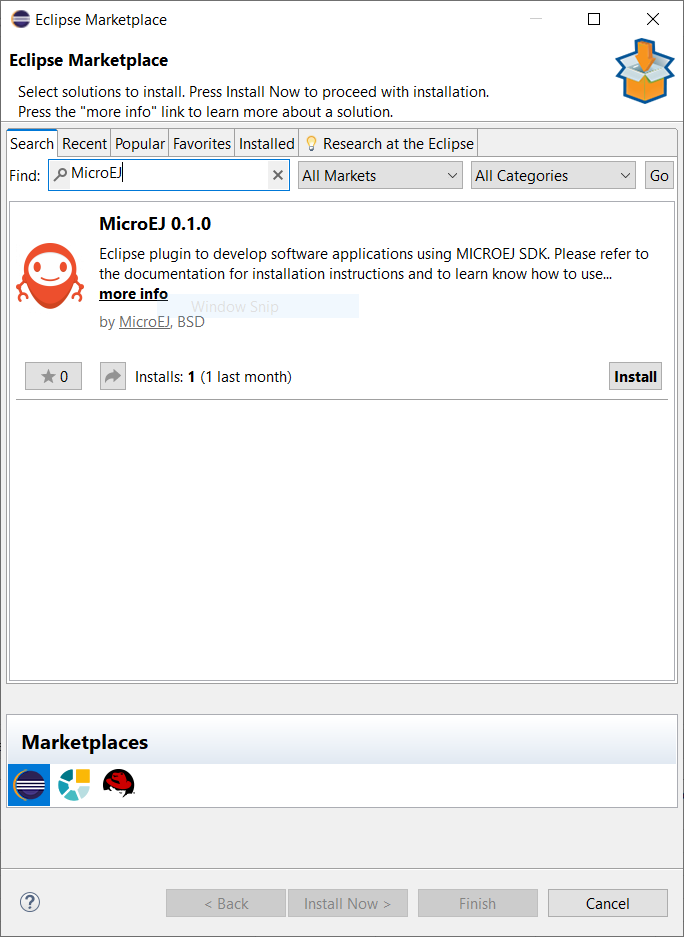
Follow these steps to install the latest stable version of the MicroEJ plugin for Eclipse:
In Eclipse, go to Help > Eclipse Marketplace….
In the search field, type MicroEJ and press Enter:
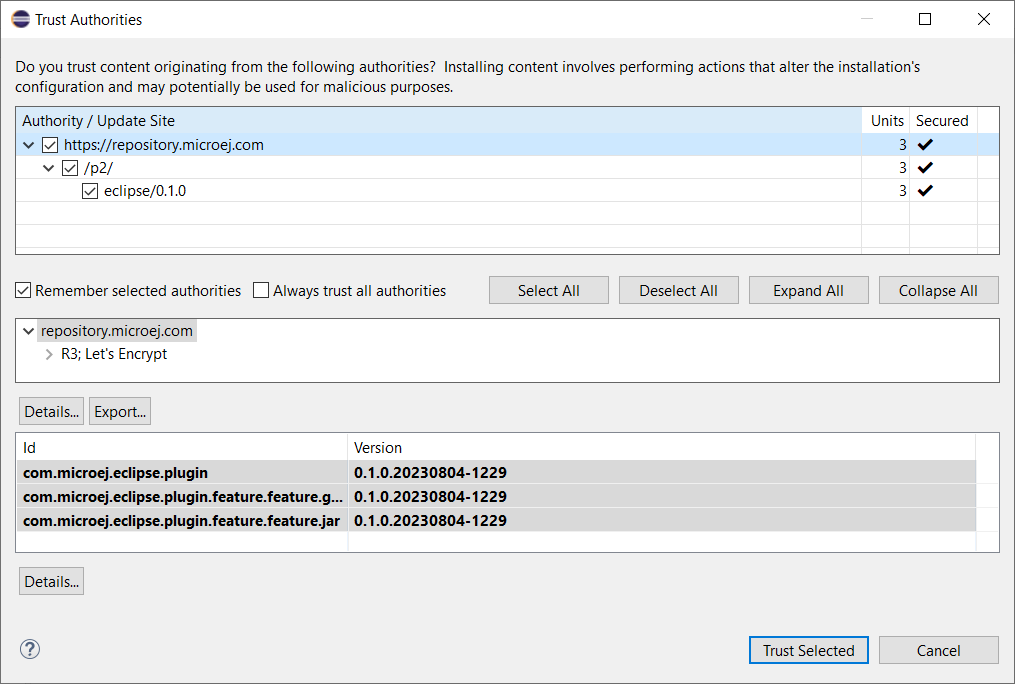
In the upcoming window, click on the Restart Now button.
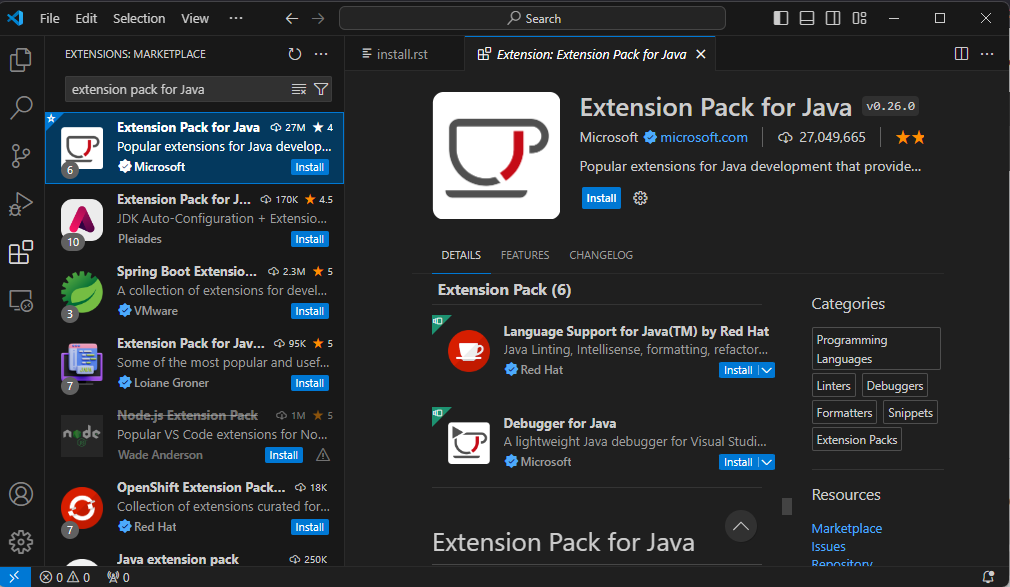
MicroEJ does not provide a dedicated extension for VS Code, but Microsoft provides an extension that brings a useful collection of extensions for Java
called Extension Pack for Java. To install this extension:
In Visual Studio Code, open the Extensions tab (Ctrl+Shift+X).
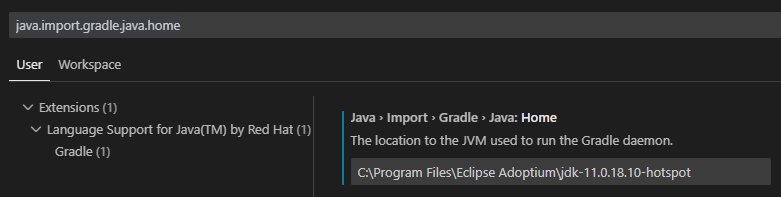
The extension ships with an embedded JDK, which is used for UI-triggered Gradle builds (for example via the Gradle view or automatic project import).
In contrast, builds started from the Terminal (Git Bash, PowerShell, etc.) use the JDK pointed to by JAVA_HOME or the one found on the PATH.
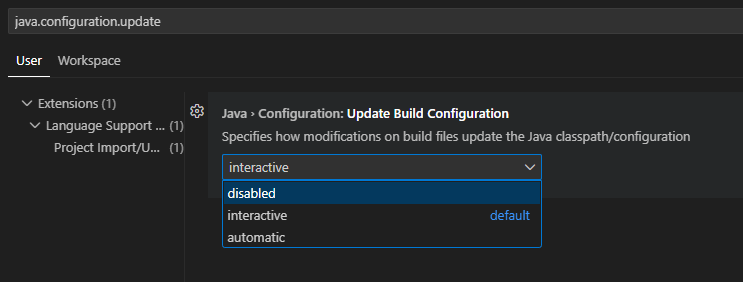
It is recommended to explicitly configure the JDK used by the VS Code Java extension, as this ensures that Gradle builds launched from the UI use the same JDK as the Terminal.
Go to File>Preferences>Settings.
In the search bar, type java.import.gradle.java.home and set it to the path to the correct JDK