
How to Debug
Highlighting the Bounds of the Widgets
When designing a UI, it can be pretty convenient to highlight the bounds of each widget. Here are some cases where it helps:
Verify if the layout fits the expected design.
Set the outlines (margin, padding, border).
Check the alignment of the widget content inside its bounds.
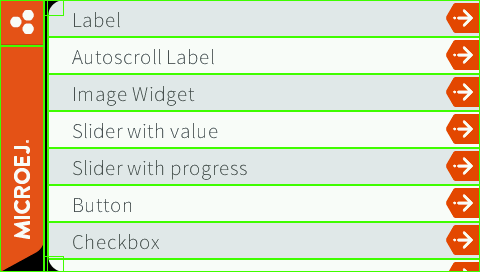
Setting the ej.mwt.debug.bounds.enabled constant to true will add a rectangle overlay over each widget and container.
For more information about constants, see the Constants section.
By default, the rectangles around the widgets are magenta.
But their color can be adjusted by modifying the ej.mwt.debug.bounds.color constant.
Here is an example of a xxx.constants.list file with the result in an application:
ej.mwt.debug.bounds.enabled=true
ej.mwt.debug.bounds.color=0x00ff00
Note
Available since MWT 3.3.0.
Enabling Traces for System View
MWT logs some keypoints when traces are enabled (see Event Tracing).
Here is the list of the logs:
The creation of a widget. A unique ID is associated to the widget at this moment that will be used in the other traces all along its lifetime.
The creation of a desktop. A unique ID is associated to the desktop at this moment that will be used in the other traces all along its lifetime.
The request to show a desktop.
The request to layout a widget.
The request to layout a desktop.
The request to render a widget. The region of the rendering request is available in the trace.
The request to render a desktop.
The update of the style of a widget. There is another trace for the end of the cascading update of containers.
The compute of the optimal size of a widget. There is another trace for the end of the cascading compute of containers.
The lay out of a widget. There is another trace for the end of the cascading lay out of containers.
The rendering of a widget. There is another trace for the end of the cascading rendering of containers.
When a widget is shown.
When a widget is hidden.
When a desktop is shown.
When a desktop is hidden.
When a widget is attached.
When a widget is detached.
The execution of an animation. (Start and stop.)
The framerate of an animation when it ends.
When an animator is ticked. (Start and stop.)
It is possible to print more information about the created widgets and desktops (to associate the ID with an actual object).
It can be activated by setting the Application Option named ej.mwt.debug.log.trace.enabled to true.
The traces can be seen in SystemView.
For the traces to be more human-readable, the file SYSVIEW_MWT.txt must be put in SystemView installation folder (e.g. SEGGER/SystemView_V252a/Description/).
This file can be found in the resources folder of the jar of MWT.
Otherwise, it can be created manually with the following content:
NamedType UIDestination *="[dest=0x%x]"
NamedType ObjectID *="id=%u"
NamedType TypeID *="type=%x"
NamedType FPS *="fps=%u"

0   MWT_CreateWidget            %ObjectID %TypeID
1   MWT_CreateDesktop           %ObjectID %TypeID
20  MWT_RequestShowDesktop      %ObjectID %TypeID
21  MWT_RequestLayout           %ObjectID %TypeID
22  MWT_RequestLayoutDesktop    %ObjectID %TypeID
23  MWT_RequestRender           %ObjectID %TypeID region=(%u,%u)(%ux%u)
24  MWT_RequestRenderDesktop    %ObjectID %TypeID
25  MWT_UpdateStyle             %ObjectID %TypeID | %ObjectID %TypeID
26  MWT_ComputeOptimalSize      %ObjectID %TypeID availableSize=(%ux%u) | %ObjectID
27  MWT_Layout                  %ObjectID %TypeID region=(%u,%u)(%ux%u) | %ObjectID
# // region seen as a container (use a START event)
28  MWT_Render                  %UIDestination %ObjectID %TypeID region=(%u,%u)(%ux%u) | %ObjectID
29  MWT_OnShown                 %ObjectID %TypeID
30  MWT_OnHidden                %ObjectID %TypeID
31  MWT_OnShownDesktop          %ObjectID %TypeID
32  MWT_OnHiddenDesktop         %ObjectID %TypeID
33  MWT_OnAttached              %ObjectID %TypeID
34  MWT_OnDetached              %ObjectID %TypeID
17  MWT_Animation               %ObjectID %TypeID | %ObjectID
18  MWT_AnimationFPS            %ObjectID %FPS
19  MWT_AnimatorTick            count=%x | count=%x

# Next ID: 35

# Deprecated
2   MWT_RequestShowDesktop      %ObjectID
3   MWT_RequestLayout           %ObjectID
4   MWT_RequestLayoutDesktop    %ObjectID
5   MWT_RequestRender           %ObjectID region=(%u,%u)(%ux%u)
6   MWT_RequestRenderDesktop    %ObjectID
7   MWT_UpdateStyle             %ObjectID | %ObjectID
8   MWT_ComputeOptimalSize      %ObjectID availableSize=(%ux%u) | %ObjectID
9   MWT_Layout                  %ObjectID region=(%u,%u)(%ux%u) | %ObjectID
# // region seen as a container (use a START event)
10  MWT_Render                  %UIDestination %ObjectID region=(%u,%u)(%ux%u) | %ObjectID
11  MWT_OnShown                 %ObjectID
12  MWT_OnHidden                %ObjectID
13  MWT_OnShownDesktop          %ObjectID
14  MWT_OnHiddenDesktop         %ObjectID
15  MWT_OnAttached              %ObjectID
16  MWT_OnDetached              %ObjectID
Note
Available since MWT 3.6.0.
Monitoring the Render Operations
When developing a GUI application, it may not be obvious what/how exactly the UI is rendered.
Especially, when a widget can be re-rendered from a distant part of the application code.
Or simply because of the RenderPolicy used.
MWT provides a way to inject a monitor for the following render operations:
Render requests done by the Application.
Successive render executions triggered by the
RenderPolicy.
Setting the ej.mwt.debug.render.enabled constant to true will enable the monitoring of above render operations.
For more information about the monitoring mechanism, see RenderPolicy Javadoc.
For more information about constants, see the Constants section.
The Widget library provides a default monitor implementation that prints the operations on the standard output. The logs produced also contain information about what is rendered (widget and area) and what code requested the rendering. For more information about this monitor implementation, see RenderMonitor Javadoc.
To use a different implementation (and if Widget is not in the classpath), set the ej.mwt.debug.render.monitor constant
to the FQN of the monitor implementation class.
Here is an example of a xxx.constants.list file with the result in an application:
ej.mwt.debug.render.enabled=true
ej.mwt.debug.render.monitor=ej.widget.debug.RenderMonitor
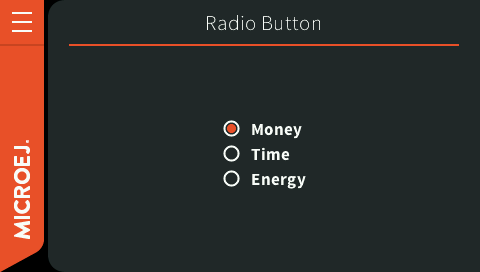
Screenshot before click
rendermonitor@ INFO: Render requested on com.microej.demo.widget.common.PageHelper$2 > SimpleDock > OverlapContainer > SimpleDock > List > RadioButton at {0,0 87x25} of {221,116 87x25} by com.microej.demo.widget.radiobutton.widget.RadioButtonGroup.setChecked(RadioButtonGroup.java:47)
rendermonitor@ INFO: Render requested on com.microej.demo.widget.common.PageHelper$2 > SimpleDock > OverlapContainer > SimpleDock > List > RadioButton at {0,0 87x25} of {221,166 87x25} by com.microej.demo.widget.radiobutton.widget.RadioButtonGroup.setChecked(RadioButtonGroup.java:50)
rendermonitor@ INFO: Render executed on  com.microej.demo.widget.common.PageHelper$2 > SimpleDock > OverlapContainer > SimpleDock > List > RadioButton at {-221,-116 87x25} of {221,116 87x25}
rendermonitor@ INFO: Render executed on  com.microej.demo.widget.common.PageHelper$2 > SimpleDock > OverlapContainer > SimpleDock > List > RadioButton at {-221,-141 87x25} of {221,141 87x25}
rendermonitor@ INFO: Render executed on  com.microej.demo.widget.common.PageHelper$2 > SimpleDock > OverlapContainer > SimpleDock > List > RadioButton at {-221,-166 87x25} of {221,166 87x25}
rendermonitor@ INFO: Render executed on  com.microej.demo.widget.common.PageHelper$2 > SimpleDock > OverlapContainer > ImageWidget at {133,116 87x25} of {44,0 20x16}
rendermonitor@ INFO: Render executed on  com.microej.demo.widget.common.PageHelper$2 > SimpleDock > OverlapContainer > ImageWidget at {133,-140 87x25} of {44,256 20x16}
rendermonitor@ INFO: Render executed on  com.microej.demo.widget.common.PageHelper$2 > SimpleDock > OverlapContainer > SimpleDock > List > RadioButton at {-221,-116 87x25} of {221,166 87x25}
rendermonitor@ INFO: Render executed on  com.microej.demo.widget.common.PageHelper$2 > SimpleDock > OverlapContainer > ImageWidget at {133,166 87x25} of {44,0 20x16}
rendermonitor@ INFO: Render executed on  com.microej.demo.widget.common.PageHelper$2 > SimpleDock > OverlapContainer > ImageWidget at {133,-90 87x25} of {44,256 20x16}
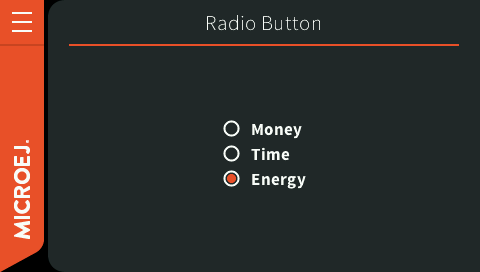
Screenshot after click
Note
Available since MWT 3.5.0 & Widget 5.0.0.
Monitoring the Animators
Since an animator ticks its animations as often as possible, the animator may take 100% CPU usage if none of its animations requests a render.
MWT provides a way to inject a monitor to be notified when none of the animations has requested a render during an animator tick.
Setting the ej.mwt.debug.animator.enabled constant to true will enable animator monitoring.
For more information about constants, see the Constants section.
The Widget library provides a default monitor implementation which logs warning messages.
The logs produced also contain information about the animations running on the animator.
The Animation instances are logged using their toString() method, so it can be a good idea to override this method
in the Animation subclasses to be able to identify them.
To use a different implementation (and if Widget is not in the classpath), set the ej.mwt.debug.animator.monitor constant
to the FQN of the monitor implementation class.
Here is an example of a xxx.constants.list file with the result in an application:
ej.mwt.debug.animator.enabled=true
animatormonitor WARNING: No render requested during animator tick. Animations list: [Watchface update animation]
Note
Available since MWT 3.5.0 & Widget 5.0.0.
Finding which Rule Originates the Attributes of a Widget’s Style
The method CascadingStylesheet.getStyleSources() is able to retrieve the selectors used to create a Style (that has been originated from a CascadingStylesheet).
It requires to set the constant ej.mwt.debug.cascadingstyle.enabled to true.
The result of this method is an array containing 16 selectors: one for each parameter of the style.
The indices for each style entry are available as constants in the CascadingStylesheet class.
For each entry, the selector belongs to the rule selected to fill the matching parameter (thus set by getSelectorStyle()).
A null entry means that the parameter is from the default style (thus set by getDefaultStyle()).
This feature is used in the HierarchyInspector of the Widget library.
Warning
Beware that enabling that feature may downgrade the performances (more time to compute a style and more Managed Heap used).
Note
Available since MWT 3.6.0.
Detecting Text Overflow
Widgets that display a text may experience text overflow when the strings are too long to fit into the available area. It can be the case, for example, in applications that support multiple languages because widgets have to deal with texts of different lengths.
This document presents a solution to detect such text overflows.
Instrumenting the Widget
The goal is to check whether the text to be displayed is within the content bounds of the widget. A way to test this is to extend or modify the widget.
In this article, the widget MyLabel will extend the type Label from the Widget library, which displays a text:
import ej.widget.basic.Label;

public class MyLabel extends Label {

    public MyLabel(String text) {
        super(text);
    }
}
Overriding the onLaidOut() Method
Once the position and size of a widget are set during the lay out process, the onLaidOut() method is called to notify the widget.
Overriding onLaidOut() of class MyLabel is a good place to check whether the text overflows or not.
For example, the following snippet compares the text width with the available width: it will print a message if an overflow is detected.
@Override
protected void onLaidOut() {
    super.onLaidOut();

    // compute the width of the text with the specified font
    final Font font = getStyle().getFont();
    final String text = getText();
    final int textWidth = font.stringWidth(text);

    // compare to the width available for the content of the widget
    final int contentWidth = getContentBounds().getWidth();
    if (textWidth > contentWidth) {
        System.out.println("Overflow detected:\n > Text: \"" + text + "\"\n > Width = " + textWidth + " px (available: " + contentWidth + " px)");
    }
}
Testing
Here is a case where the widget size is set manually to be a little shorter than the text width:
public static void main(String[] args) {
    MicroUI.start();
    Desktop desktop = new Desktop();
    Canvas canvas = new Canvas();
    // add a label with an arbitrary fixed width of 25 pixels (which is too short)
    canvas.addChild(new MyLabel("Some text"), 20, 20, 25, 10);
    desktop.setWidget(canvas);
    desktop.requestShow();
}
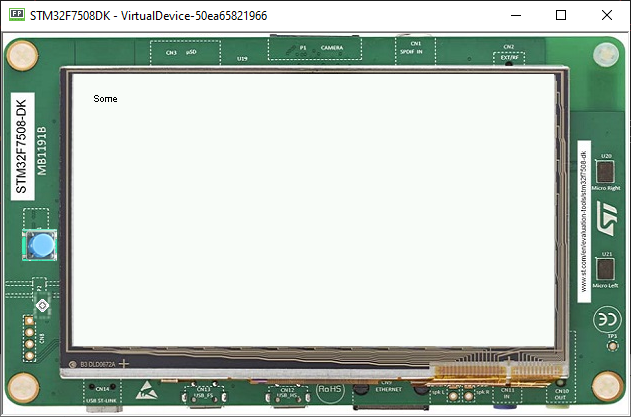
The text is cropped and the console logs that a text overflow has been detected:
=============== [ Initialization Stage ] ===============
=============== [ Converting fonts ] ===============
=============== [ Converting images ] ===============
=============== [ Launching on Simulator ] ===============
Overflow detected:
 > Text: "Some text"
 > Width = 47 px (available: 25 px)
Improving the Detection
To ease the correction process, it is best to add some additional debug information to locate the issue. Let’s extract the text overflow detection into a helper class, so that it is available for all classes across the application.
The following snippet:
extracts the text overflow detection into the class
MyTextHelper.prints the part of the text that is displayed.
prints the path to the widget in the widget tree to help the tester locate the affected widget in the GUI.
public class MyLabel extends Label {

    public MyLabel(String text) {
        super(text);
    }

    @Override
    protected void onLaidOut() {
        super.onLaidOut();

        final Font font = getStyle().getFont();
        final String text = getText();
        MyTextHelper.checkTextOverflow(this, text, font);
    }
}

public class MyTextHelper {

    /**
    * Checks whether the given text overflows for the specified widget and font. In the case where an overflow is
    * detected, the method prints a message that details the error.
    *
    * @param widget
    *            the widget that displays the text.
    * @param text
    *            the text to display.
    * @param font
    *            the font used for drawing the text.
    */
    public static void checkTextOverflow(final Widget widget, final String text, final Font font) {
        final int textWidth = font.stringWidth(text);
        final int contentWidth = widget.getContentBounds().getWidth();

        if (textWidth > contentWidth) {
            String displayedText = buildDisplayedText(text, font, contentWidth);
            String widgetPath = buildWidgetPath(widget);
            System.out.println(
                    "Overflow detected:\n > Text: \"" + text + "\"\n > Width = " + textWidth + " px (available: "
                            + contentWidth + " px) \n > Displayed: \"" + displayedText + "\"\n > Path : " + widgetPath);
        }
    }

    private static String buildDisplayedText(String text, Font font, int width) {
        for (int i = text.length() - 1; i > 0; i--) {
            if (font.substringWidth(text, 0, i) <= width) {
                return text.substring(0, i);
            }
        }

        return "";
    }

    private static String buildWidgetPath(Widget widget) {
        StringBuilder builder = new StringBuilder();

        Widget ancestor = widget;
        do {
            builder.insert(0, " > " + ancestor.getClass().getSimpleName());
            ancestor = ancestor.getParent();
        } while (ancestor != null);
        builder.insert(0, widget.getDesktop().getClass().getSimpleName());

        return builder.toString();
    }
}
When the application is launched again, the console shows more information about the text overflow:
=============== [ Initialization Stage ] ===============
=============== [ Converting fonts ] ===============
=============== [ Converting images ] ===============
=============== [ Launching on Simulator ] ===============
Overflow detected:
 > Text: "Some text"
 > Width = 47 px (available: 25 px)
 > Displayed: "Some"
 > Path : Desktop > Canvas > MyLabel
To keep control over the extra verbosity and code size, one option is to use BON constants to enable/disable this debug code at will.
In the following snippet, when the constant com.mycompany.check.text.overflow is set to false, the debug code will not be embedded in the application.
public static void checkTextOverflow(final Widget widget, final String text, final Font font) {
    if (Constants.getBoolean("com.mycompany.check.text.overflow")) {
        final int textWidth = font.stringWidth(text);
        final int contentWidth = widget.getContentBounds().getWidth();

        if (textWidth > contentWidth) {
            String displayedText = buildDisplayedText(text, font, contentWidth);
            String widgetPath = buildWidgetPath(widget);
            System.out.println(
                    "Overflow detected:\n > Text: \"" + text + "\"\n > Width = " + textWidth + " px (available: "
                            + contentWidth + " px) \n > Displayed: \"" + displayedText + "\"\n > Path : " + widgetPath);
        }
    }
}