Images
Adding Images
Create two packages in the Resources folder, one named
listand another namedimages.Create an images list file, and add it to the
listpackage (myapp.images.list).Save the following image to the
imagespackage:
The structure looks like this:

Then go to the
myapp.images.listand add the image file:/images/microej_logo.png:ARGB4444
The image declaration in the .list file follows this pattern:
path:format
pathis the path to the image file, relative to theresourcesfolder.formatspecifies how the image will be embedded in the application.
Note
The ARGB4444 mode is used here because the image has transparency, more info in the Images section.
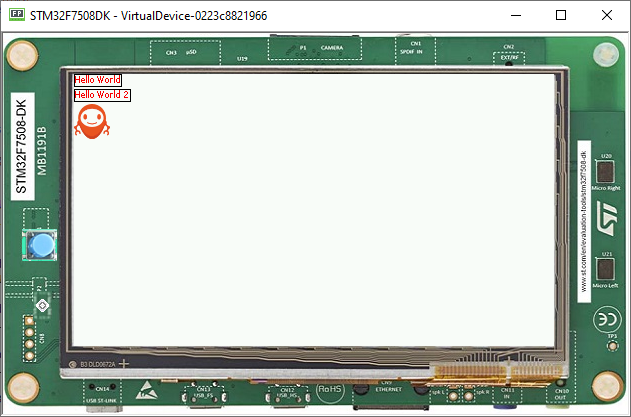
Displaying an Image
To display this image, first create an instance of the widget ImageWidget, specifying the path to the image in the constructor:
ImageWidget image = new ImageWidget("/images/microej_logo.png");
Add the widget to the canvas container by adding this line:
canvas.addChild(image, 0, 30, Widget.NO_CONSTRAINT, Widget.NO_CONSTRAINT);
The final code looks like this:
public static void main(String[] args) {
   MicroUI.start();
   Desktop desktop = new Desktop();
   Label label = new Label("Hello World");
   Label label2 = new Label("Hello World 2");

   Canvas canvas = new Canvas();
   canvas.addChild(label, 0, 0, Widget.NO_CONSTRAINT, Widget.NO_CONSTRAINT);
   canvas.addChild(label2, 0, 15, Widget.NO_CONSTRAINT, Widget.NO_CONSTRAINT);

   ImageWidget image = new ImageWidget("/images/microej_logo.png");
   canvas.addChild(image, 0, 30, Widget.NO_CONSTRAINT, Widget.NO_CONSTRAINT);

   CascadingStylesheet css = new CascadingStylesheet();
   EditableStyle style = css.getSelectorStyle(new TypeSelector(Label.class));
   style.setColor(Colors.RED);
   style.setBorder(new RectangularBorder(Colors.BLACK, 1));

   desktop.setStylesheet(css);
   desktop.setWidget(canvas);
   desktop.requestShow();
}

Next step: Advanced Styling
