
Warning
This documentation is for SDK 5. The latest major version is SDK 6. SDK 5 is in maintenance mode since the release of SDK 5.8.0. Consequently, as stated in the SDK End User License Agreement (EULA), the SDK will reach the end of its life by July 2028. Contact our support team for assistance with migrating to the new SDK, or your sales representative if you require an extension of SDK maintenance as a service.
Run on the Simulator
Note
This page is releated to the version 5 and lower of the SDK. If you use the SDK 6, please refer to the page Run on Simulator.
Once a Sandboxed Application project has been created, it can be tested on the Simulator.
The Simulator requires a Virtual Device to execute the Application. Please refer to the Kernel Developer Guide to learn how to get or create one.
From the SDK
In order to test a Sandboxed Application in the SDK, the first thing to do is to import the Virtual Device of the Multi-Sandbox Executable:
go to Window > Preferences > MicroEJ > Virtual Devices
click on Import…
the Virtual Device can be provided as a folder or as a
.vdefile, select the adequate format and the Virtual Device resourcecheck the License checkbox to accept it
click on Finish
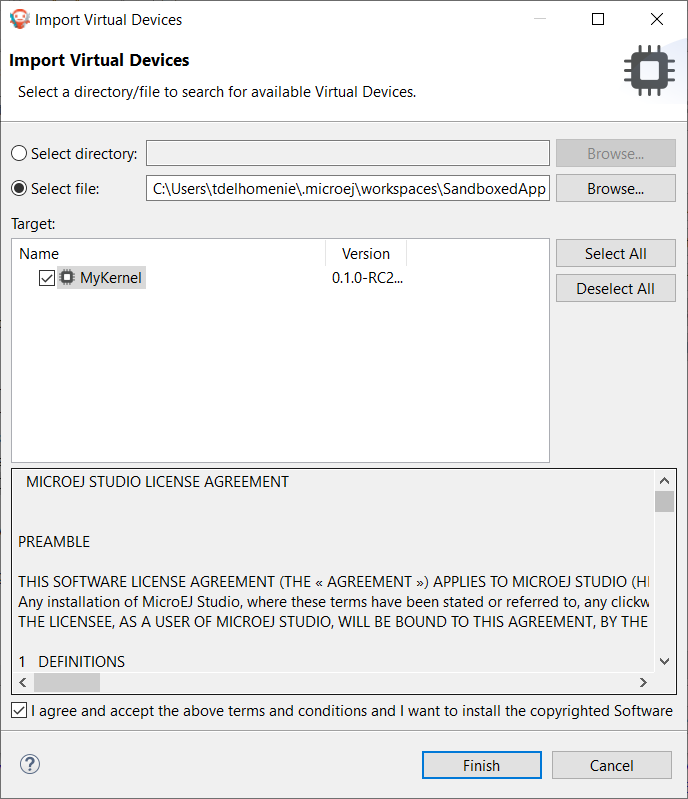
Virtual Device Import
Now the Application can be executed by right-clicking on its project, then clicking on Run As > MicroEJ Application.
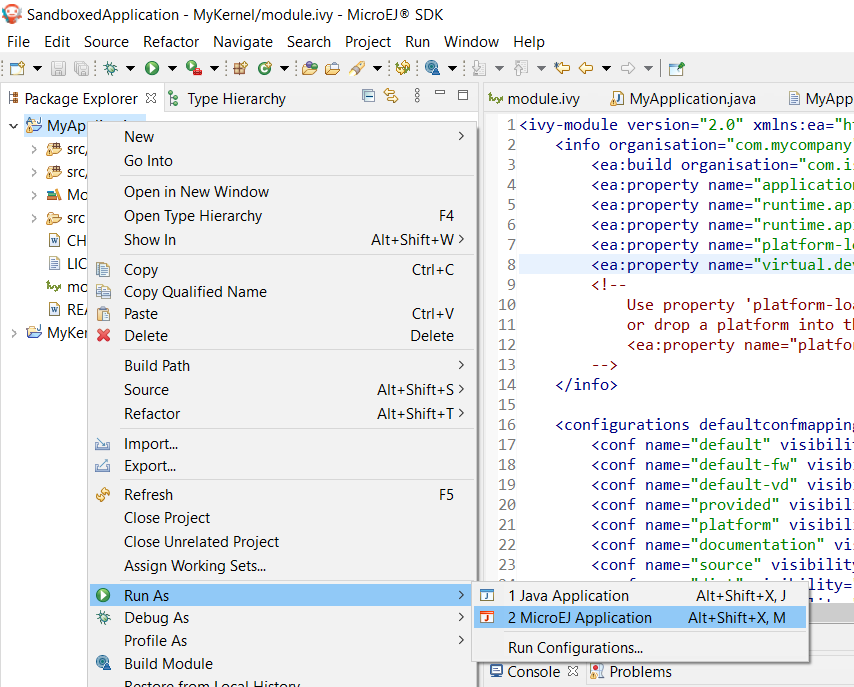
Sandboxed Application Run
If there is only one Virtual Device imported in the SDK, it is automatically used to execute the Application. Otherwise, you have to select the one you want to use.
With the Application created in the section Create a First Application, the output should be:
=============== [ Initialization Stage ] ===============
=============== [ Converting fonts ] ===============
=============== [ Converting images ] ===============
=============== [ Launching on Simulator ] ===============
KERNEL Hello World!
=> Starting Feature MyApplication
Feature MyApplication started!
=============== [ Completed Successfully ] ===============

SUCCESS
Run Multiple Sandboxed Applications
It is possible to execute additional Sandboxed Applications besides the main Sandboxed Application project. This is typically useful when you want to test the integration of a Sandboxed Application that communicates with an other one, for example through a Shared Interface.
The additional Sandboxed Applications must have been previously built in its binary format (WPK, see Remote Deployment section). Then, to include them:
Select the Sandboxed Application project,
Create the
META-INF/wpkfolders,Drop any
*.wpkfiles in theMETA-INF/wpkfolder.
Your Sandboxed Application project shall look like:
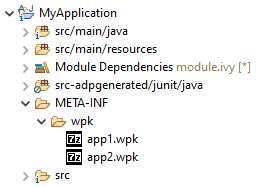
Now, when launching the Sandboxed Application project, these additional Sandboxed Applications will also be executed on the Virtual Device.
From the Command Line Interface
An Sandboxed Application can also be launched on the Simulator via the Command Line Interface. Before continuing, make sure the Command Line Interface is installed and correctly configured.
In your favorite terminal application, go to the root folder of the Application and execute the following commands:
mmm build
mmm run -Dplatform-loader.target.platform.file=/path/to/the/virtual-device.vde
With the Application created in the section Create a First Application, the output should be:
MicroEJ Simulator is being launched. Relax and enjoy...
=============== [ Initializing Easyant ] ===============
=============== [ Resolving and retrieving dependencies ] ===============
=============== [ Compiling sources ] ===============
=============== [ Loading platform ] ===============
=============== [ Initialization Stage ] ===============
=============== [ Converting fonts ] ===============
=============== [ Converting images ] ===============
=============== [ Launching on Simulator ] ===============
KERNEL Hello World!
=> Starting Feature MyApplication
Feature MyApplication started!
=============== [ Completed Successfully ] ===============

SUCCESS
Note that the Virtual Device location can also be configured in the module.ivy file of the Sandboxed Application project:
<ea:property name="platform-loader.target.platform.file" value="/path/to/the/virtual-device.vde"/>
The Virtual Device can also be provided differently, for example from a dependency in the module.ivy file.
Refer to the Select a VEE Port section for the list of available capabilities.