This documentation is for SDK 5. The latest major version is SDK 6.
SDK 5 is in maintenance mode since the release of SDK 5.8.0.
Consequently, as stated in the SDK End User License Agreement (EULA), the SDK will reach the end of its life by July 2028.
Contact our support team for assistance with migrating to the new SDK, or your sales representative if you require an extension of SDK maintenance as a service.
Modern electronic device design involves many parts and teams to
collaborate to finally obtain a product to be sold on its market.
MicroEJ encourages modular design which involves various stake holders:
hardware engineers, UX designers, graphic designers, drivers/BSP
engineers, software engineers, etc.
Modular design is a design technique that emphasizes separating the
functionality of an application into independent, interchangeable
modules. Each module contains everything necessary to execute only one
aspect of the desired functionality. In order to have team members
collaborate internally within their team and with other teams, MicroEJ
provides a powerful modular design concept, with smart module
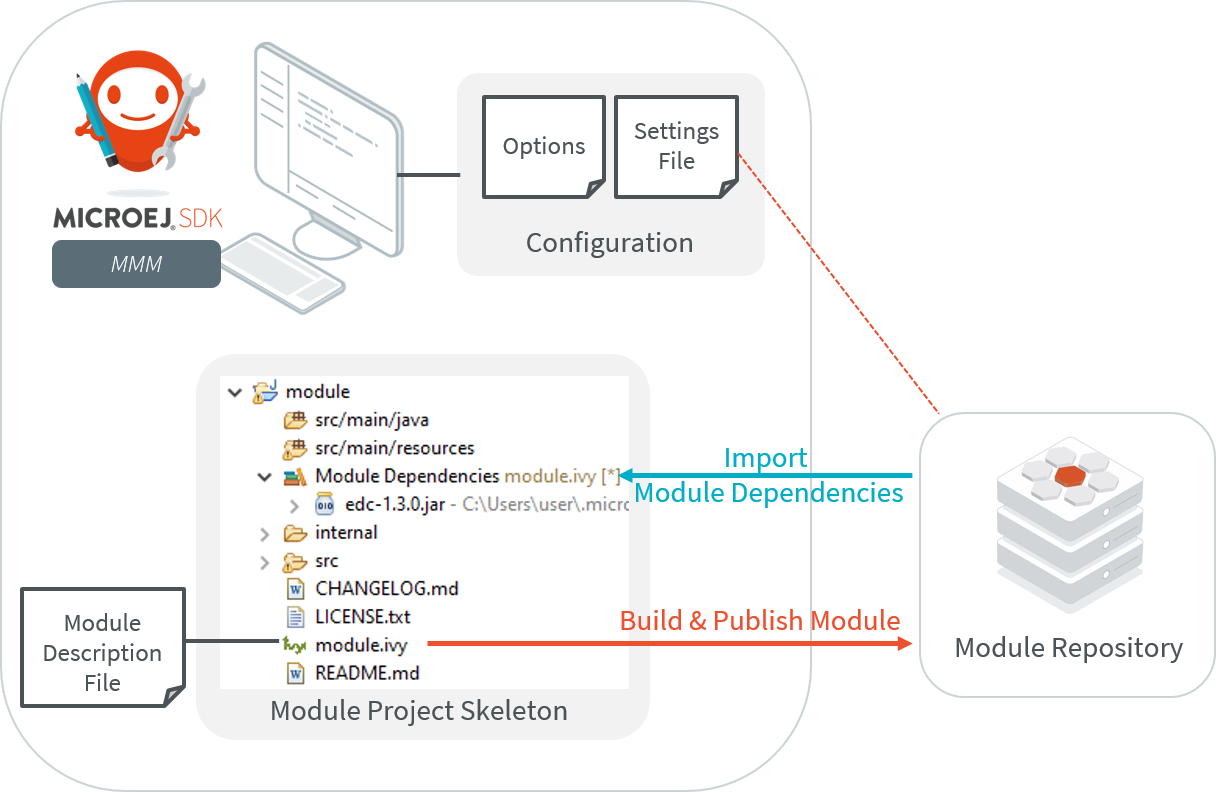
dependencies, controlled by the MicroEJ Module Manager (MMM). MMM frees
engineers from the difficult task of computing module dependencies.
Engineers specify the bare minimum description of the module
requirements.
The following schema introduces the main concepts detailed in this chapter.
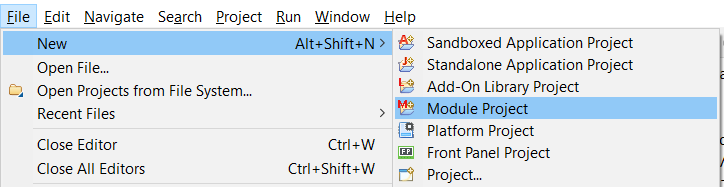
Fill the module information (project name, module organization, name and revision),
Select one of the suggested skeletons depending on the desired module nature,
Click on Finish.
The project is created and a set of files and directories are generated from the selected skeleton.
Note
When an empty Eclipse project already exists or when the skeleton has to be created within an existing directory,
the MicroEJ module is created as follows:
In the Package Explorer, click on the parent project or directory,
A module description file is an Ivy configuration file named module.ivy, located at the root
of each MicroEJ module project.
It describes the module nature (also called build type) and dependencies to other modules.
Refer to the documentation of Module Natures for the list of available build options for each Module Nature.
The options can also be defined via System Properties.
If an option is defined as both System Property and ea:property tag, the value passed as System Property takes precedence.
When the plugin is enabled, for each module dependency, MMM will check
the version declared in the module file and update it to the highest
version available which satisfies the matching rule of the dependency.
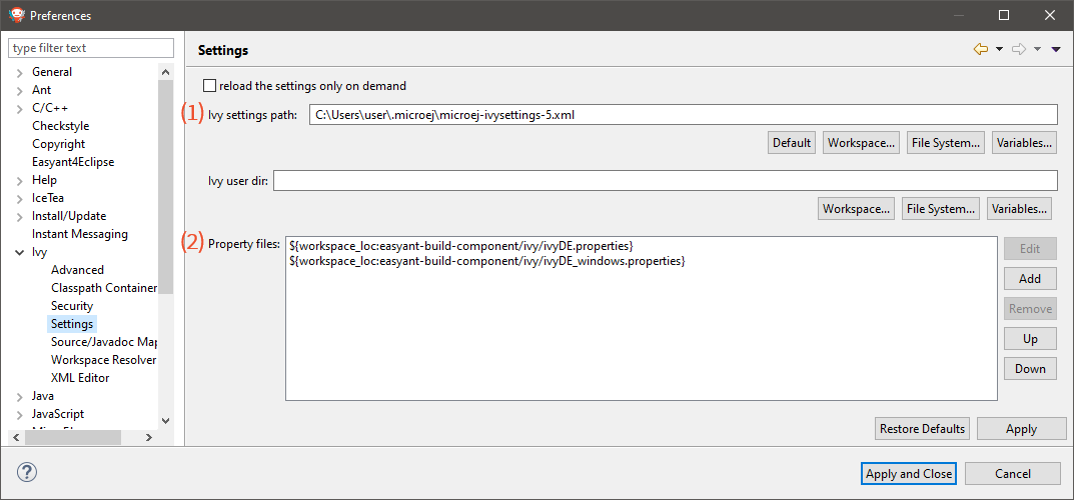
By default, when starting an empty workspace, the SDK is configured to import dependencies
from MicroEJ Central Repository and to publish built modules to a local directory.
The repository configuration is stored in a settings file (ivysettings.xml), and the default one
is located at <USER_HOME>\.microej\microej-ivysettings-[VERSION].xml
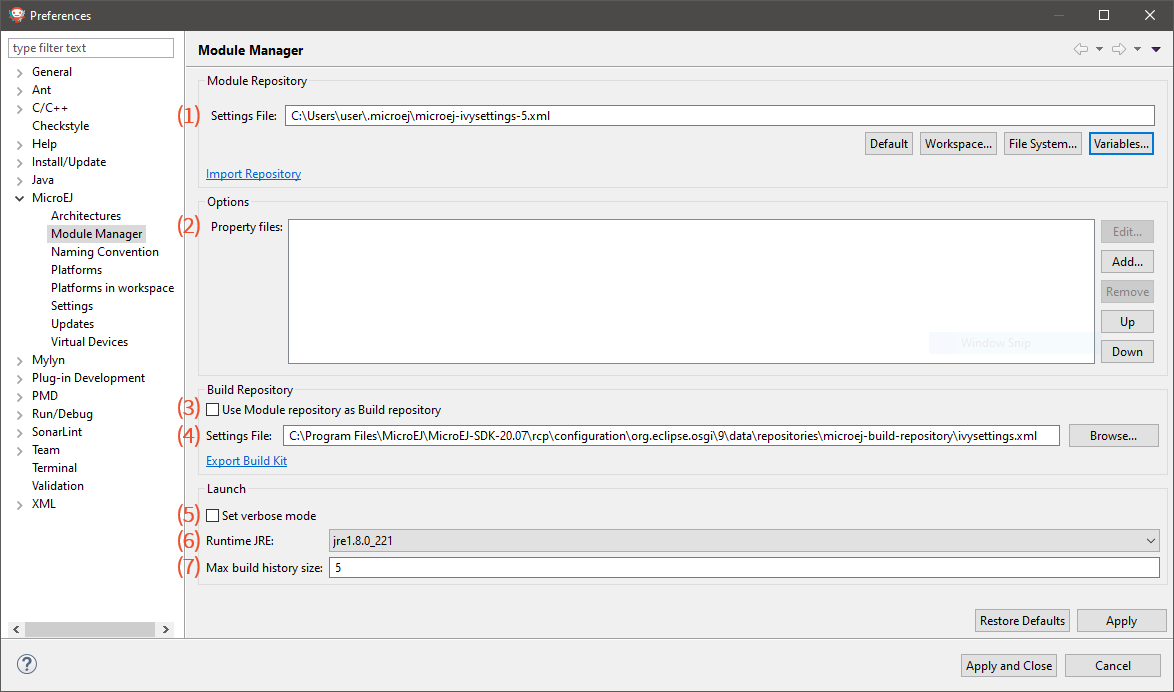
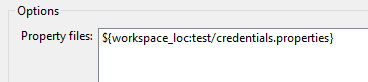
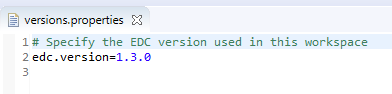
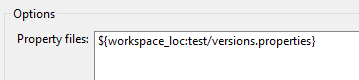
Options: files declaring MMM options. See the Options section.
UseModulerepositoryasBuildrepository:
the settings file for connecting the build repository in place of the one bundled in the SDK.
This option shall not be enabled by default and is reserved for advanced configuration.
BuildrepositorySettingsFile:
the settings file for connecting the build repository in place of the one bundled in the SDK.
This option is automatically initialized the first time the SDK is launched.
It shall not be modified by default and is reserved for advanced configuration.
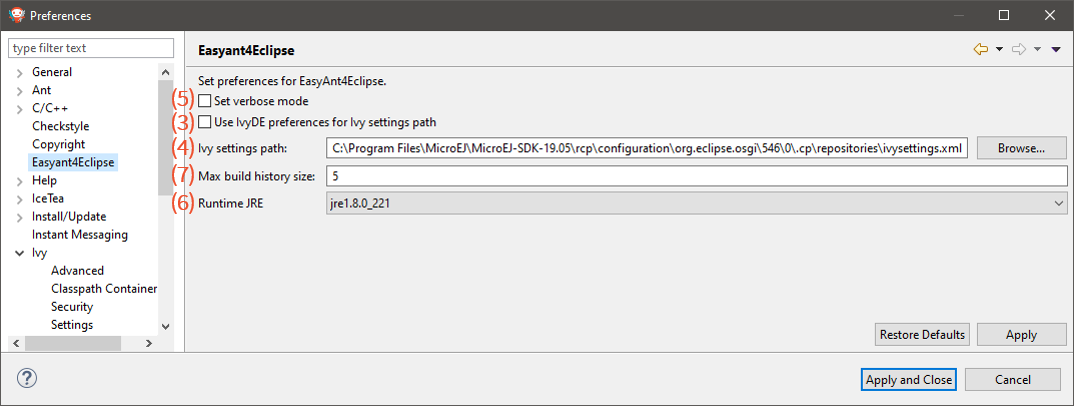
Setverbosemode: to enable advanced debug traces when building a module.
RuntimeJRE: the Java Runtime Environment that executes the build process.
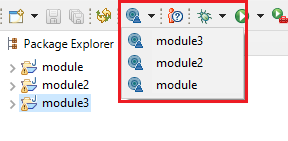
Maxbuildhistorysize: the maximum number of previous builds available in Build Module shortcut list:
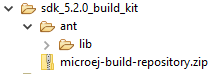
The Module Manager Build Kit is a consistent set of tools, scripts, configuration and artifacts required for building modules in command-line mode.
Starting from SDK 5.4.0, it also contains a Command Line Interface (CLI).
The Build Kit allows to work in headless mode (e.g. in a terminal) and to build your modules using a Continuous Integration tool.
The Build Kit is bundled with the SDK and can be exported using the following steps: [2]
Add the bin directory of the Build Kit directory to the PATH environment variable of your machine.
Make sure the JAVA_HOME environment variable is set and points to a JRE/JDK installation or that java executable is in the PATH environment variable (Java 8 is required)
Confirm that the installation works fine by executing the command mmm--version. The result should display the MMM CLI version.
on Windows, either in the command prompt using the Windows batch script mmm.bat or in MinGW environments such as Git BASH using the bash script mmm.
on macOS and Linux distributions using the bash script mmm.
Warning
When copying a build kit from one system to another, make sure to delete the cache of the buildtype repository (/microej-build-repository/cache) which may contain absolute paths.
The build repository (microej-build-repository directory) contains scripts and tools for building modules. It is specific to a SDK version and shall not be modified by default.
The module repository (microej-module-repository directory) contains a default Settings File for importing modules from Central Repository and this local repository (modules that are locally built will be published to this directory).
You can override with custom settings or by extracting an offline repository.
To go further with headless builds, please consult the next chapter for command line builds,
and this tutorial to setup MicroEJ modules build in continuous integration environments.
where COMMAND is the command to execute (for example mmmbuild).
The available commands are:
help: display help information about the specified command
init: create a new project
clean: clean the project
build: build the project
publish: build the project and publish the module
run: run the MicroEJ Application project on the Simulator
The available options are:
--help (-h): show the help message and exit
--version (-V): print version information and exit
--build-repository-settings-file (-b): path of the Ivy settings file for build scripts and tools. Defaults to ${CLI_HOME}/microej-build-repository/ivysettings.xml.
--module-repository-settings-file (-r): path of the Ivy settings file for modules. Defaults to ${CLI_HOME}/microej-module-repository/ivysettings.xml.
--ivy-file (-f): path of the project’s Ivy file. Defaults to ./module.ivy.
--verbose (-v): verbose mode. Disabled by default. Add this option to enable verbose mode.
-Dxxx=yyy: any additional option passed as system properties.
When no command is specified, MMM CLI executes Easyant with custom targets using the --targets (-t) option (defaults to clean,verify).
In order to share configuration across several projects, these parameters can be defined in the file ${user.home}/.microej/.mmmconfig.
This file uses the TOML format.
Parameters names are the same than the ones passed as system properties, except the character _ is used as a separator instead of -.
The parameters defined in the [options] section are passed as system properties.
Here is an example:
Backslash characters (\) must be doubled (for example a Windows path C:\\Users\\johndoe\\ivysettings.xml)
Command line options take precedence over those defined in the configuration file.
So if the same option is defined in both locations, the value defined in the command line is used.
The command init creates a new project (executes Easyant with skeleton:generate target).
The skeleton and project information must be passed with the following system properties:
skeleton.org: organisation of the skeleton module. Defaults to com.is2t.easyant.skeletons.
skeleton.module: name of the skeleton module. Mandatory, defaults to microej-javalib.
skeleton.rev: revision of the skeleton module. Mandatory, defaults to + (meaning the latest released version).
project.org: organisation of the project module. Mandatory, defaults to com.mycompany.
project.module: name of the project module. Mandatory, defaults to myproject.
project.rev: revision of the project module. Defaults to 0.1.0.
skeleton.target.dir: relative path of the project directory (created if it does not exist). Mandatory, defaults to the current directory.
If one of these properties is missing, it will be asked in interactive mode:
$ mmminit-Dskeleton.org=com.is2t.easyant.skeletons-Dskeleton.module=microej-javalib-Dskeleton.rev=4.2.8-Dproject.org=com.mycompany-Dproject.module=myproject-Dproject.rev=1.0.0
...-skeleton:check-generate: [input] skipping input as property skeleton.org has already been set. [input] skipping input as property skeleton.module has already been set. [input] skipping input as property skeleton.rev has already been set. [input] The path where the skeleton project will be unzipped [/home/tdelhomenie/microej/working/skeleton]
To force the non-interactive mode, the property skeleton.interactive.mode must be set to false.
In non-interactive mode the default values are used for missing non-mandatory properties, and the creation fails if mandatory properties are missing.
$ mmminit-Dskeleton.org=com.is2t.easyant.skeletons-Dskeleton.module=microej-javalib-Dskeleton.rev=4.2.8-Dproject.org=com.mycompany-Dskeleton.target.dir=myproject-Dskeleton.interactive.mode=false...* Problem Report:expected property 'project.module': Module name of YOUR project
clean
The command clean cleans the project (executes Easyant with clean target).
For example
mmm clean
cleans the project.
build
The command build builds the project (executes Easyant with clean,verify targets).
For example
mmm build -f ivy.xml -v
builds the project with the Ivy file ivy.xml and in verbose mode.
publish
The command publish builds the project and publishes the module. This command accepts the publication target as a parameter, amongst these values:
local (default value): executes the clean,publish-local Easyant target, which publishes the project with the resolver referenced by the property local.resolver in the Settings File.
shared: executes the clean,publish-shared Easyant target, which publishes the project with the resolver referenced by the property shared.resolver in the Settings File.
release: executes the clean,release Easyant target, which publishes the project with the resolver referenced by the property release.resolver the Settings File.
For example
mmm publish local
builds the project and publishes the module using the local resolver.
run
The command run runs the application on the Simulator (executes Easyant with compile,simulator:run targets).
It has the following requirements:
to run on the Simulator, the project must be configured with one of the following Module Natures:
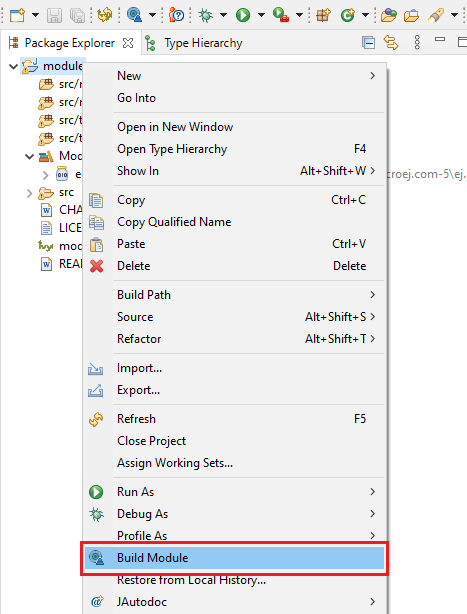
the module must have been built once before running the Simulator. So the mmmbuild command must be executed before running the Simulator the first time or after a project clean (mmmclean command).
Note
The next times, it is not required to rebuild the module if source code files have been modified. The content of src/main/java and src/main/resources folders are automatically compiled by mmmrun command before running the Simulator.
For example
mmm run -D"platform-loader.target.platform.file"="/path/to/the/platform.zip"
runs the application on the given platform.
The Simulator can be launched in debug mode by setting the property execution.mode of the application file build/commons.properties to debug:
MMM allows to modify the behavior of a build via System options.
These options must be passed as system properties, using CLI-D option or via the SDK Configuration options.
MMM provides the following options:
easyant.debug.port : defines the debug port and triggers the debug mode for the build execution.
A Meta Build is a module allowing to build other modules.
It is typically used in a project containing multiple modules.
The Meta Build module serves as an entry point to build all the modules of the project.
The main element to configure in a meta build is the list of modules to build.
This is done in 2 files, located at the root folder:
public.modules.list which contains the list of the modules relative paths to build and publish.
private.modules.list which contains the list of the modules relative paths to build.
These modules are not published but only stored in a private and local repository in order to be fetched by the public modules.
The format of these files is a plain text file with one module path by line, for example:
module1module2module3
These paths are relative to the meta build root folder, which is set by default to the parent folder of the meta build module (..).
For this reason, a meta build module is generally created at the same level of the other modules to build.
Here is a typical structure of a meta build:
If the following message appears when resolving module dependencies:
:: problems summary :::::: WARNINGS module not found: com.mycompany#mymodule;[M.m.p-RC,M.m.(p+1)-RC[ :::::::::::::::::::::::::::::::::::::::::::::: :: UNRESOLVED DEPENDENCIES :: :::::::::::::::::::::::::::::::::::::::::::::: :: com.mycompany#mymodule;[M.m.p-RC,M.m.(p+1)-RC[: not found ::::::::::::::::::::::::::::::::::::::::::::::
First, check that either a released module com.mycompany/mymodule/M.m.p or a snapshot module com.mycompany/mymodule/M.m.p-RCYYYYMMDD-HHMM exists in your module repository.
If the module does not exist,
if it is declared as a direct dependency, the module repository is not compatible with your source code.
You can either check if an other module version is available in the repository or add the missing module to the repository.
otherwise, this is likely a missing transitive module dependency. The module repository is not consistent.
Check the module repository settings file and that consistency check has been enabled during the module repository build (see Configure Consistency Check).
If the module exists, this may be either a configuration issue or a network connection error.
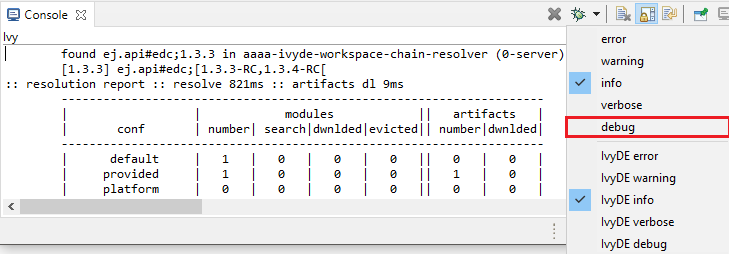
We have to find the cause in the resolution logs.
Note
The activation of the verbose mode depends on how the resolution has been launched:
if the error occurs during workspace resolution, configure the verbose mode of resolution logs,
if the error occurs while building a module from workspace, check the verbose mode option in preferences page,
if the error occurs while building a module from command line, set the verbose mode option in command line options.
If your module repository URL or filesystem path does not appear, check your settings file. This is likely a missing resolver.
Otherwise, if your module repository is an URL, this may be a network connection error between MMM (the client) and the module repository (the server).
First, check for Invalid Certificate issue.
Otherwise, the next step is to debug at the HTTP level:
HTTP response status: [RESPONSE_CODE] url=https://[MY_REPOSITORY_URL]/com.mycompany/mymodule/CLIENT ERROR: Not Found url=https://[MY_REPOSITORY_URL]/com.mycompany/mymodule/
If the following message appears when resolving module dependencies:
HttpClientHandler: sun.security.validator.ValidatorException: PKIX path building failed: sun.security.provider.certpath.SunCertPathBuilderException: unable to find valid certification path to requested target url=[artifactory address]
This can be raised in several cases, such as:
an artifact repository configured in the MicroEJ Module Manager settings using a self-signed SSL certificate or a SSL certificate not trusted by the JDK.
the requests to an artifact repository configured in the MicroEJ Module Manager settings are redirected to a proxy server using a SSL certificate not trusted by the JDK.
In all cases, the SSL certificate (used by the artifact repository server or the proxy) must be added to the JDK trust store that is running MicroEJ Module Manager.
Ask your System Administrator, or retrieve the SSL certificate and add it to the JDK trust store:
Start Keystore Explorer, and open file [JRE_HOME]/lib/security/cacerts or [JDK_HOME]/jre/lib/security/cacerts with the password changeit.
You may not have the right to modify this file. Edit rights if needed before opening it or open Keystore Explorer with admin rights.
Click on Tools, then Import Trusted Certificate.
Select your certificate.
Save the cacerts file.
on Linux/macOS
Open a terminal.
Make sure the JDK’s bin folder is in the PATH environment variable.
If the problem still occurs, set the javax.net.debug property to all to enable SSL protocol traces:
when using the MMM CLI, add the property in the command line with: -Djavax.net.debug=all
when using the Build Module button in the SDK, add the property in the MicroEJ Module Manager options as described in the section Options
when resolving the dependencies on a project in the SDK with the button Ivy > Resolve,
add the following line at the end of the file MicroEJ-SDK.ini located at the root of the SDK installation:
-Djavax.net.debug=all
and start the SDK from a terminal.
In all cases, such logs should appear in the terminal or in the SDK console:
The error very probably occurs during the handshake phase of the SSL negotiation.
There should be the following trace before the error:
ConsumingserverCertificatehandshakemessage
The traces below this one indicates the SSL certificate (or the SSL certificates chain) presented by the server.
This certificate or one of the root or intermediate certificates must be added in the JDK truststore as explained previously.
MMM Preferences Pages are located in two dedicated pages. The following pictures show the options mapping using the same options numbers declared in Preferences Page.