
Warning
This documentation is for SDK 5. The latest major version is SDK 6. SDK 5 is in maintenance mode since the release of SDK 5.8.0. Consequently, as stated in the SDK End User License Agreement (EULA), the SDK will reach the end of its life by July 2028. Contact our support team for assistance with migrating to the new SDK, or your sales representative if you require an extension of SDK maintenance as a service.
Run on the Device
The deployment of a Sandboxed Application on a device depends on the Kernel implementation. We can group them in two categories:
Local Deployment: the device is connected to the developer’s computer, the SDK builds the
.fofrom the workspace project classes and transfers it on the device (recommended during application development).Remote Deployment: the Application is built, then the device connects a Repository where the Application is stored, and deploys it over the air using a device management system (production deployment).
In both cases, deploying a Sandboxed Application requires that a Multi-Sandbox Executable is running on the device. Please refer to the Kernel Developer Guide to learn how to build it or browse the Resources Repository for Multi-Sandbox demo Firmware available for popular hardware evaluation kits.
Local Deployment
Deploying an Application on a device locally is the easiest way to test it since it only requires:
the Application project sources imported in the SDK,
the device programmed with a Multi-Sandbox Executable that provides the Local Deployment capability (you can browse the Resources Repository for available demos of such Multi-Sandbox Executable),
the device connected to the developer’s computer either on the same network (LAN) or using a serial wire, depending on the Firmware capabilities.
If these prerequisites are fulfilled:
duplicate the Run Configuration created in the chapter Run on the Simulator,
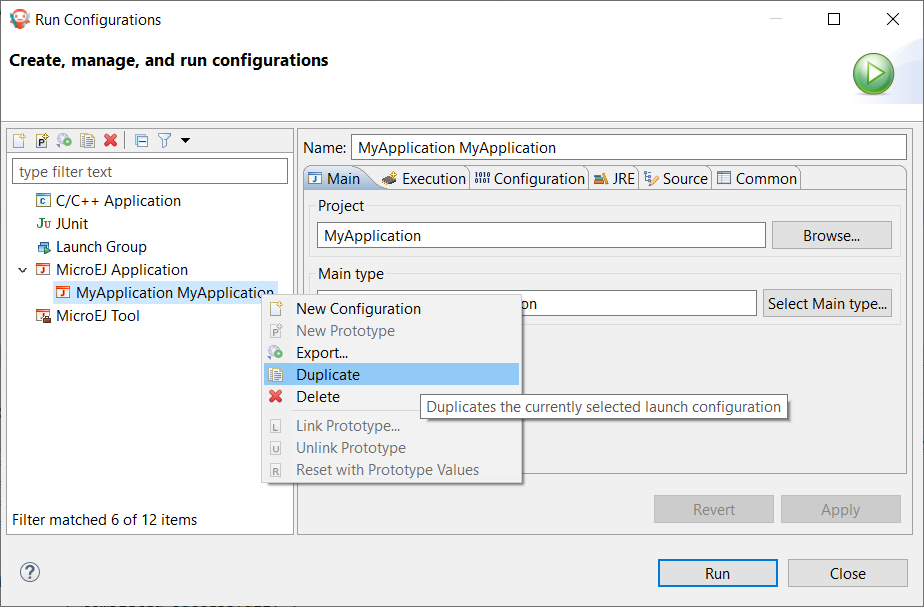
Duplicate Run Configuration
rename the duplicated Run Configuration, for example by prefixing by
(Local),in the Execution tab, modify the Execution mode to Execute on Device,
Note
The selected Platform must be a Virtual Device (VDE) including the Local Deployment capability, not a VEE Port.
select the option Local Deployment (Socket) in the Settings list. Note that depending on the device capability, the virtual device may implement a local deployment over a Comm Port.
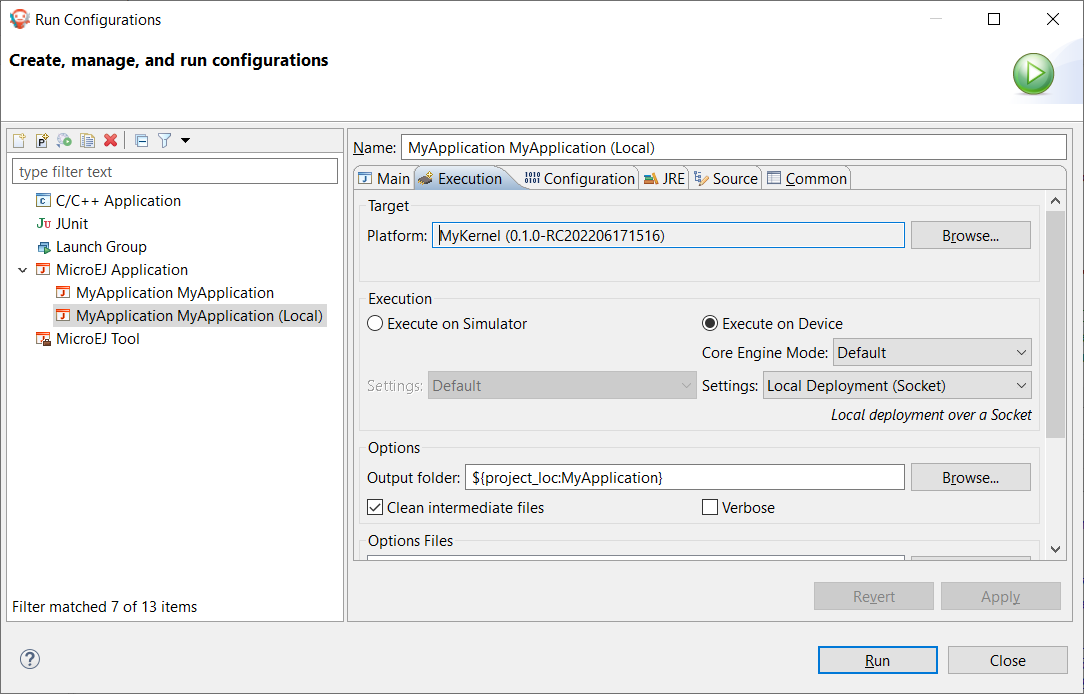
Configure Run Configuration
go to the Configuration tab,
select the item Local Deployment (Socket),
set the IP address of the device in the Host field,
click on the Run button to deploy the Application on the board.
The Console output should be:
=============== [ Initialization Stage ] ===============
=============== [ Converting fonts ] ===============
=============== [ Converting images ] ===============
=============== [ Build Application ] ===============
=============== [ Completed Successfully ] ===============
=============== [ Deploy on 192.168.0.7:4000 ] ===============
=============== [ Completed Successfully ] ===============

SUCCESS
The Application is deployed on the device and automatically started. You can use a Serial terminal to get the traces of the Application:
KERNEL Hello World!
=> Starting Feature MyApplication
Feature MyApplication started!
Remote Deployment
Remote Deployment requires building and publishing the Sandboxed Application module. To do so, in the SDK, right-click on the Sandboxed Application project and click on Build Module.
The build process will display messages in the console, ending up the following message:
[echo] project hello published locally with version 0.1.0-RC201907091602

BUILD SUCCESSFUL

Total time: 1 minute 6 seconds
The files produced by the build process are located in a dedicated
target~/artifacts folder in the project and is published to the
target module repository declared in MicroEJ Module Manager settings file.
The file that ends with .wpk (the WPK file) is a portable file that contains all necessary binary data to build .fo files on any compatible Multi-Sandbox Executable.
Then, the WPK file can be published to a MICROEJ FORGE instance.
Please contact our support team if you want to get more information on MICROEJ FORGE and automated Applications deployment through a device management system.